The wife’s Goblin, 2007 L61 F23

Markm

Well-Known Member
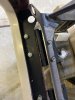
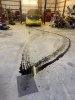
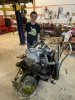
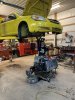
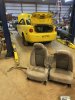
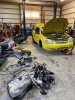
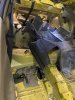
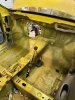
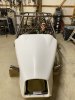
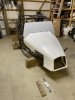
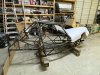
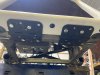
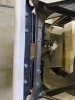
The start of chassis #496. My name is Mark and my wife is Veronica. I have about 24 years worth of experience in Chevrolet service until I started working from home in 2020. Picked up our kit Friday morning and toured DF with Adam which was really good fun. Emmett and I (my son) unloaded our Goblin and started setting up our work area. We attended Goblinfest 2023 and had the opportunity to ride and drive a few of y’all’s awesome cars so when we got home we planned out our kit and placed an order.
 

Attachments

Last edited:

Ross

Goblin Guru
It was good to see you at Goblinfest. Congrats on the new project!!
 
Last edited:

Desert Sasqwatch

Goblin Guru
Welcome Mark and to your family as well. I hope that Emmett will be helping you with your build, the Goblin is a great project for father/son time. Since you have prior Chevy service you can be a good source of information to your fellow Goblin family - if you chose to do so.
 

Markm

Well-Known Member
Worked on hinging the hood today and made a prop rod for the wife to display her goblin at car shows. I found a couple hinges in a drawer and had this tube for another project and decided to use it. I welded a bolt on each end and later I’ll get a wing nut for the prop rod. I haven’t figured out where the rod will be stored just yet
 

Attachments

Desert Sasqwatch

Goblin Guru
Recommend making some reinforcement to the thin bottom lip on the hood where you mounted the hinges - extra thickness with more fiberglass at a minimum, bonding (2 part epoxy) in some metal plate AND add the fiberglass over the top would be much better. Just my opinion - to save from cracking the bottom lip on the hood. ;)
 

Markm

Well-Known Member
Recommend making some reinforcement to the thin bottom lip on the hood where you mounted the hinges - extra thickness with more fiberglass at a minimum, bonding (2 part epoxy) in some metal plate AND add the fiberglass over the top would be much better. Just my opinion - to save from cracking the bottom lip on the hood. ;)
I bolted the hinges to the bottom after riveting the metal plate on the inside and bolts sandwich it all together. It seems pretty sturdy this way. I’m no body man though either
 

Attachments

Markm

Well-Known Member
Ass man myself... :cool:
I like the hinges. Are you going to put some kind of quick release latches on the other end to replace the 1/4" screws and nuts?
That’s a good question. I was thinking about some sort of hood pins or maybe wing nuts and wing bolts but concerned they won’t stay tight enough to keep from rattling or working loose. My initial thought was a hood pin sorta like these
 

Attachments

Sebnuts

Well-Known Member
That’s a good question. I was thinking about some sort of hood pins or maybe wing nuts and wing bolts but concerned they won’t stay tight enough to keep from rattling or working loose. My initial thought was a hood pin sorta like these
Yea, I'm leaning toward those too. @MR.812 used them, wrote about them here.
 

Markm

Well-Known Member
Emmett and I had a productive day. We got most of the donor torn down minus the dash. The shell is ready to go out. We didn’t start until 4pm and accumulated right at 5 hours of labor
 

Attachments

Markm

Well-Known Member
The wife worked last night and got a nap today then came out to help me get started on the harness and this is about as far as we got on what I remembered from watching the thinning videos. I think we made really good headway for 2.5 hours
 

Attachments

Markm

Well-Known Member
I was cleaning up the instrument cluster. I decided to turn off the airbag light, low tire warning, traction control light and abs lights. Maybe someone else has tried this already but if not it’s an easy task. I placed a couple pieces of electrical tape to block the light coming through. The face will flex enough without needing to remove the needles.
 

Attachments

Rttoys

Goblin Guru
Yep. I made thread on that a while back. super easy.

 
Last edited:

ah.b.normal

Goblin Guru
The wife worked last night and got a nap today then came out to help me get started on the harness and this is about as far as we got on what I remembered from watching the thinning videos. I think we made really good headway for 2.5 hours
I know this wiring looks daunting but if you've survived working at a dealership you'll nail this! Just remember, Every wire you remove is another wire you won't have to mess with! Just look at the growing scrap pile, smile:cool: and know you'll never see them again!
 

Markm

Well-Known Member
spent a little time on the harness this evening. I’m at the point of merging the dash and main harnesses. Being our donor is an LS I added the circuits for the cruise, I also retained the power outlet and ip dimmer cause sometimes my eyes are strained by excessive interior lighting. My table isn’t as neat as Lonnie’s but it’ll make do
 

Attachments

Markm

Well-Known Member
I’m missing something here. Lonnie states to save the fog lamp wire (orange) in part 9 video but have an LS there’s no orange and I’ve watched through and don’t see where it’s used. Do I need to add the circuit?
 

Sebnuts

Well-Known Member
I’m missing something here. Lonnie states to save the fog lamp wire (orange) in part 9 video but have an LS there’s no orange and I’ve watched through and don’t see where it’s used. Do I need to add the circuit?
You don't "need" the fog lamp circuit. It's only used as an accessory circuit if you want to use it. There are some quirks with its operation, so it has limited use case anyway. I will be using mine to run aftermarket seat heaters.
 

Desert Sasqwatch

Goblin Guru
Purple? GM changed wire colors all the time. I'm seeing purple in the wiring schematics for most years and models. But it could be pink or red too. Did you label things as you disassembled your donor?
 
Top