neodied
Well-Known Member
Hey, this is my build log! (format shamelessly copied from devianteng's build log)
Tips for future builders: (so you don't have to read the whole thread for the advice bits)
DISASSEMBLY
- Don't bother with a steering wheel puller tool, just use the hammer method from the videos
- Loosen the axle nuts slightly before you jack up the front end especially if you don't have a 1/2" impact
- If your steering knuckle is as much of a pain as mine was, you can disconnect at the collapsible intermediate shaft instead, but then the process of dropping the subframe will be more difficult
WIRING HARNESS
- Label every wiring harness connector as you disconnect it (I am using "wired manila shipping tags")
- In Wiring Harness video #4, don't fully wrap up the ECM and fuse box multiplugs before thinning the accessory power and I/P harness. Some of those wires may go to the wrapped bits and you'll just have to undo the wrapping.
- If you are not 100% confident when thinning wires, leave an inch or two of wire at the fuse block/ECM/BCM plugs, so you can fix any accidentally-cut wires by soldering them back in. You can always go back later at the end to trim these tails more.
STAGE 1
- When applying urethane adhesive to the floor panels, DO NOT get any in or around the 1/4" holes where the support strap bolts go. If you do, the bolts will collect the adhesive as they get inserted, and you'll end up with a nasty mess on the bolt, nut, your wrench, and your hands.
STAGE 2
- When installing your shift cables, route them away from the exhaust pipe and make sure they can't wiggle loose.
About me:
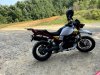
My digital nom de plume is Neo/Neodied and I'm an auto engineer in the Royal Oak, MI area who also enjoys tinkering with overpowered computers and software in my free time. If you happen to have a decommissioned enterprise server in your basement we might be best friends! My first vehicle ever was a Suzuki DRZ-400SM and I drove that around rain or shine for years until I moved out here to Michigan where winters are actually a real thing. But I've always had a bike in my garage to give me the speed fix I need. Life changes and I swear distracted drivers get worse and worse each year, so the wife and I agreed it was time to let the motorcycle era fade, but only if I could have a 4-wheeled funmobile that hits the same level of excitement. I don't have any real experience tuning or tinkering on cars, though I am comfortable doing basic wrenching so the DFKC Youtube tutorial videos are what really got me over the hump into "yeah I can do this" territory.
Build concept:
Road legal, track capable, zipping around town running errands like a hooligan. This is replacing my motorcycle as the fun vehicle, so I want high "engagement". I will almost certainly do power and handling upgrades down the road when I get the itch, but keeping things mostly stock or plug-and-play for now to minimize initial cost and avoid jumping in over my head. Wife acceptance factor should be decent as well.
Donor car:
Consensus seems to be that an LSJ provides the best starting point for making big power without overhauling internals. And I love the sound of a supercharger. Found a rear-ended 2007 SS/SC manual donor on CoPart in a sunny state (no Michigan rustbuckets for me) and had it shipped, arriving a few weeks ago. I lucked out getting the G85 RPO according to the trunk tag, hopefully the LSD is still present.
I plan to do all the preventative maintenance on the powertrain once it's out, and maybe replace the clutch while it's easily accessible. I don't trust any previous owners of a salvaged tuner car...
Order sheet:
copied from my Choosing a Kit thread
Other additions/mods:
- Quick release steering wheel (not sure if I will go with the DFKC one or another)
- Upgraded lower rod end mounts (DFKC store, multiple people report the stock ones can fail under enthusiastic driving conditions)
- Billet shifter (my stock shifter feels pretty mediocre and the DFKC one looks really great, but I think the order window for that closed a while ago, not sure if another round will open up? any info would be appreciated)
- Timing chain guide bolt (preventative)
- New clutch (maybe do this while the engine is out to set myself up for bigger power later, maybe wait a bit and see how the current clutch fares)
- Front aero wing (when I eventually decide that I need more zip at the track)
BUILD LOG
2021-10-??
Donor arrived, I drove it around the block and the spinny bits all spin. Too much noise from scraping body panels to hear any warning sounds, but it feels alright. Definitely well worn interior and exterior though (120K miles). Good thing those are disposable!
2021-11-??
I tore off all the impacted body bits and briefly drove it. No noticeable scraping/squeaking/rattling sounds. The clutch feels pretty vague, so a replacement is in the cards eventually. The engine hunts a bit at idle, but I hope that can be resolved when I inevitably get it tuned by ZZP. Unless that's something you have to figure out first before tuning? The engine oil is sludge, I hope there's no exacerbated wear on the internals. No leaks though!
2021-11-22
Order placed with much excitement, snagging frame #375. Now I have the winter to work on stripping my donor down and modding the harness.
2022-01-19
Major milestone in donor teardown, the interior is gone! I haven't dropped the subframe or powertrain but those are coming soon.
2022-03-10
Got the call from Stewart Transport, frame should be arriving next week! I still have to drop the engine (just need the hoist, everything else is ready), remove the dash, and remove the wiring harness then dispose of the donor shell. Busy weekend ahead...
2022-03-14
Engine pulled, dash removed, wiring harness extracted. Much progress. I think all I have left is: fuel system, rear suspension, and dash stripping. Then starting the harness and powertrain prep. Frame should arrive this week!
2022-03-17
Donor shell gone, Goblin frame and Stage 1 kit is here! Waiting on response from powder coat companies and wiring harness rework kit. I can start cleaning and prepping the donor parts now though.
2022-03-30
Wiring Harness video #1 complete (unwrapping). Other future builders: don't be like me, label your connectors and you will be happy you did when the harness work happens.
2022-04-20
Tagged all the main body harness connectors (since I neglected to do that during disassembly) and started spreadsheet for connector identification.
2022-05-07
Wiring harness rework 99% complete! I need to solve a missing wire problem (heat exchanger fan) which may involve installing a relay triggered by BCM.
2022-07-03
Got my powdercoated frame back a few days ago. Starting the assembly videos! Ran into a snag with the center tunnel brake line.
2023-05-10
First fire! Got a lot of suspension assembled as well. Maybe half way through stage 2.
2023-07-18
First drive! Nothing felt too out of the ordinary. The engine needs a tune I'm sure, and an alignment is in order, and the brakes need to be looked at (quite soft). But it drove!
Tips for future builders: (so you don't have to read the whole thread for the advice bits)
DISASSEMBLY
- Don't bother with a steering wheel puller tool, just use the hammer method from the videos
- Loosen the axle nuts slightly before you jack up the front end especially if you don't have a 1/2" impact
- If your steering knuckle is as much of a pain as mine was, you can disconnect at the collapsible intermediate shaft instead, but then the process of dropping the subframe will be more difficult
WIRING HARNESS
- Label every wiring harness connector as you disconnect it (I am using "wired manila shipping tags")
- In Wiring Harness video #4, don't fully wrap up the ECM and fuse box multiplugs before thinning the accessory power and I/P harness. Some of those wires may go to the wrapped bits and you'll just have to undo the wrapping.
- If you are not 100% confident when thinning wires, leave an inch or two of wire at the fuse block/ECM/BCM plugs, so you can fix any accidentally-cut wires by soldering them back in. You can always go back later at the end to trim these tails more.
STAGE 1
- When applying urethane adhesive to the floor panels, DO NOT get any in or around the 1/4" holes where the support strap bolts go. If you do, the bolts will collect the adhesive as they get inserted, and you'll end up with a nasty mess on the bolt, nut, your wrench, and your hands.
STAGE 2
- When installing your shift cables, route them away from the exhaust pipe and make sure they can't wiggle loose.
About me:
My digital nom de plume is Neo/Neodied and I'm an auto engineer in the Royal Oak, MI area who also enjoys tinkering with overpowered computers and software in my free time. If you happen to have a decommissioned enterprise server in your basement we might be best friends! My first vehicle ever was a Suzuki DRZ-400SM and I drove that around rain or shine for years until I moved out here to Michigan where winters are actually a real thing. But I've always had a bike in my garage to give me the speed fix I need. Life changes and I swear distracted drivers get worse and worse each year, so the wife and I agreed it was time to let the motorcycle era fade, but only if I could have a 4-wheeled funmobile that hits the same level of excitement. I don't have any real experience tuning or tinkering on cars, though I am comfortable doing basic wrenching so the DFKC Youtube tutorial videos are what really got me over the hump into "yeah I can do this" territory.
Build concept:
Road legal, track capable, zipping around town running errands like a hooligan. This is replacing my motorcycle as the fun vehicle, so I want high "engagement". I will almost certainly do power and handling upgrades down the road when I get the itch, but keeping things mostly stock or plug-and-play for now to minimize initial cost and avoid jumping in over my head. Wife acceptance factor should be decent as well.
Donor car:
Consensus seems to be that an LSJ provides the best starting point for making big power without overhauling internals. And I love the sound of a supercharger. Found a rear-ended 2007 SS/SC manual donor on CoPart in a sunny state (no Michigan rustbuckets for me) and had it shipped, arriving a few weeks ago. I lucked out getting the G85 RPO according to the trunk tag, hopefully the LSD is still present.
I plan to do all the preventative maintenance on the powertrain once it's out, and maybe replace the clutch while it's easily accessible. I don't trust any previous owners of a salvaged tuner car...
Order sheet:
copied from my Choosing a Kit thread
Chassis Length: Extended
I'm 6'3" and want any extra room as others have mentioned for speakers or other auxiliary components. Also, better stability at speed.
Chassis Style: Full Cage (Track) with added "monkey bars" across the top halo
I love the look of the Open Cage, but I do plan to track this and I may go for a heavier glass windshield at some point so better mounting options are a big plus. Also I plan to eventually put a roof rack on it for some cargo capacity. The monkey bar mod will also assist getting in and out (WAF). It's not on the web order form but I sent an email to DF support before placing the order, and Adam confirmed that it's still an option.
Door Bar Style: Easy Entry "Modified"/Double Bar
This was the most difficult choice for me because I wanted to balance: A) ease of entry, B) having a nice arm rest (very important to me for cruising), and C) good side protection/secure feeling. Based on multiple photos from other builds, I think this is the best compromise. This Double Door Bar mod is another option that doesn't appear on the web order form but Adam confirmed it in a pre-order email.
Hood: Yes
It's a great canvas for putting on a neat wrap or logo and I'm not going for the full naked look.
Windscreen: Yes, Extended
I changed my mind on this (originally No) based partly on the feedback in my "help me choose" thread and partly on reflection that passengers needing a full face helmet every time they get in can be a hassle.
Footwell Cover: No
I changed my mind on this also (originally Yes), most people indicating it doesn't do much for road debris or wind.
Side Panels: Yes
I changed my mind on this also (originally No), based on the "help me choose" thread where people mentioned this being key for deflecting debris.
Engine Cover: No
For looks and cost savings, I like the exposed frame and components better.
Fenders: No
I'm undecided what wheel+tire combo I will end up with and the open wheel look is pretty neat anyway. If my state inspector gives me flak about not having fenders I'll figure something out or order these separately.
Wing Mount Kit: Yes
A wing really rounds out the racecar aesthetic. I personally think the back end without one looks...incomplete? From forumgoer discussion, it seems that downforce is actually counterproductive so I'll set it to a neutral angle and likely get a functional front wing in the future..
Headlights: No
Several people here mentioned the kit lights being too dim and I like the look of other aftermarket styles better.
Mirrors + Turn Signals: Yes
License Plate Light: Yes
Taillights: Yes
Button Panels: Yes
Basic stuff to make it road legal in my area.
Boost Gauge Mount: Yes
Because it's only $10 and boost is cool.
Wire Harness Service: No
Stepping a bit outside my comfort zone on this, but the cost savings are substantial and the tutorial videos are so good that it might work out.
Seats: FX1 (not Pro)
I am a 38" waist, and I want this to be comfortable enough for my friends as well. The stock Cobalt seats would look pretty out of place and not provide enough stability with the corners I plan on taking at speed") . Mildly concerned if the ergonomics don't work out, but I think resale on these wouldn't be too bad if I decide to go with a different set.
. Mildly concerned if the ergonomics don't work out, but I think resale on these wouldn't be too bad if I decide to go with a different set.
Rear Coilover Kit: Yes
Changed my mind on this (originally No), as it's universally recommended to replace the stock setup for any real track time and I get stuck with analysis paralysis based on all the aftermarket suspension choices available. The price seems very fair.
Heat Exchanger Duct Kit: No
Cost saving and I don't really know why it would be needed. Maybe if I track it at 10/10ths for extended time?
Tow Bar Package: No
This should be fully road legal when it's all built. If I ever want to tow it on a very long trip, may order this separately.
5x114.3 Bearing Hubs: No
Undecided on wheels+tires, I'll use the stock hubs for now.
Parking Brake Kit: No
SS/SC trim option comes with parking brake kit.
I'm 6'3" and want any extra room as others have mentioned for speakers or other auxiliary components. Also, better stability at speed.
Chassis Style: Full Cage (Track) with added "monkey bars" across the top halo
I love the look of the Open Cage, but I do plan to track this and I may go for a heavier glass windshield at some point so better mounting options are a big plus. Also I plan to eventually put a roof rack on it for some cargo capacity. The monkey bar mod will also assist getting in and out (WAF). It's not on the web order form but I sent an email to DF support before placing the order, and Adam confirmed that it's still an option.
Door Bar Style: Easy Entry "Modified"/Double Bar
This was the most difficult choice for me because I wanted to balance: A) ease of entry, B) having a nice arm rest (very important to me for cruising), and C) good side protection/secure feeling. Based on multiple photos from other builds, I think this is the best compromise. This Double Door Bar mod is another option that doesn't appear on the web order form but Adam confirmed it in a pre-order email.
Hood: Yes
It's a great canvas for putting on a neat wrap or logo and I'm not going for the full naked look.
Windscreen: Yes, Extended
I changed my mind on this (originally No) based partly on the feedback in my "help me choose" thread and partly on reflection that passengers needing a full face helmet every time they get in can be a hassle.
Footwell Cover: No
I changed my mind on this also (originally Yes), most people indicating it doesn't do much for road debris or wind.
Side Panels: Yes
I changed my mind on this also (originally No), based on the "help me choose" thread where people mentioned this being key for deflecting debris.
Engine Cover: No
For looks and cost savings, I like the exposed frame and components better.
Fenders: No
I'm undecided what wheel+tire combo I will end up with and the open wheel look is pretty neat anyway. If my state inspector gives me flak about not having fenders I'll figure something out or order these separately.
Wing Mount Kit: Yes
A wing really rounds out the racecar aesthetic. I personally think the back end without one looks...incomplete? From forumgoer discussion, it seems that downforce is actually counterproductive so I'll set it to a neutral angle and likely get a functional front wing in the future..
Headlights: No
Several people here mentioned the kit lights being too dim and I like the look of other aftermarket styles better.
Mirrors + Turn Signals: Yes
License Plate Light: Yes
Taillights: Yes
Button Panels: Yes
Basic stuff to make it road legal in my area.
Boost Gauge Mount: Yes
Because it's only $10 and boost is cool.
Wire Harness Service: No
Stepping a bit outside my comfort zone on this, but the cost savings are substantial and the tutorial videos are so good that it might work out.
Seats: FX1 (not Pro)
I am a 38" waist, and I want this to be comfortable enough for my friends as well. The stock Cobalt seats would look pretty out of place and not provide enough stability with the corners I plan on taking at speed
. Mildly concerned if the ergonomics don't work out, but I think resale on these wouldn't be too bad if I decide to go with a different set.Rear Coilover Kit: Yes
Changed my mind on this (originally No), as it's universally recommended to replace the stock setup for any real track time and I get stuck with analysis paralysis based on all the aftermarket suspension choices available. The price seems very fair.
Heat Exchanger Duct Kit: No
Cost saving and I don't really know why it would be needed. Maybe if I track it at 10/10ths for extended time?
Tow Bar Package: No
This should be fully road legal when it's all built. If I ever want to tow it on a very long trip, may order this separately.
5x114.3 Bearing Hubs: No
Undecided on wheels+tires, I'll use the stock hubs for now.
Parking Brake Kit: No
SS/SC trim option comes with parking brake kit.
Other additions/mods:
- Quick release steering wheel (not sure if I will go with the DFKC one or another)
- Upgraded lower rod end mounts (DFKC store, multiple people report the stock ones can fail under enthusiastic driving conditions)
- Billet shifter (my stock shifter feels pretty mediocre and the DFKC one looks really great, but I think the order window for that closed a while ago, not sure if another round will open up? any info would be appreciated)
- Timing chain guide bolt (preventative)
- New clutch (maybe do this while the engine is out to set myself up for bigger power later, maybe wait a bit and see how the current clutch fares)
- Front aero wing (when I eventually decide that I need more zip at the track)
BUILD LOG
2021-10-??
Donor arrived, I drove it around the block and the spinny bits all spin. Too much noise from scraping body panels to hear any warning sounds, but it feels alright. Definitely well worn interior and exterior though (120K miles). Good thing those are disposable!
2021-11-??
I tore off all the impacted body bits and briefly drove it. No noticeable scraping/squeaking/rattling sounds. The clutch feels pretty vague, so a replacement is in the cards eventually. The engine hunts a bit at idle, but I hope that can be resolved when I inevitably get it tuned by ZZP. Unless that's something you have to figure out first before tuning? The engine oil is sludge, I hope there's no exacerbated wear on the internals. No leaks though!
2021-11-22
Order placed with much excitement, snagging frame #375. Now I have the winter to work on stripping my donor down and modding the harness.
2022-01-19
Major milestone in donor teardown, the interior is gone! I haven't dropped the subframe or powertrain but those are coming soon.
2022-03-10
Got the call from Stewart Transport, frame should be arriving next week! I still have to drop the engine (just need the hoist, everything else is ready), remove the dash, and remove the wiring harness then dispose of the donor shell. Busy weekend ahead...
2022-03-14
Engine pulled, dash removed, wiring harness extracted. Much progress. I think all I have left is: fuel system, rear suspension, and dash stripping. Then starting the harness and powertrain prep. Frame should arrive this week!
2022-03-17
Donor shell gone, Goblin frame and Stage 1 kit is here! Waiting on response from powder coat companies and wiring harness rework kit. I can start cleaning and prepping the donor parts now though.
2022-03-30
Wiring Harness video #1 complete (unwrapping). Other future builders: don't be like me, label your connectors and you will be happy you did when the harness work happens.
2022-04-20
Tagged all the main body harness connectors (since I neglected to do that during disassembly) and started spreadsheet for connector identification.
2022-05-07
Wiring harness rework 99% complete! I need to solve a missing wire problem (heat exchanger fan) which may involve installing a relay triggered by BCM.
2022-07-03
Got my powdercoated frame back a few days ago. Starting the assembly videos! Ran into a snag with the center tunnel brake line.
2023-05-10
First fire! Got a lot of suspension assembled as well. Maybe half way through stage 2.
2023-07-18
First drive! Nothing felt too out of the ordinary. The engine needs a tune I'm sure, and an alignment is in order, and the brakes need to be looked at (quite soft). But it drove!
Last edited: