• We've upgraded and reskinned the forum. Notice something off? Email us at [email protected] and we'll fix it.

V1 Fenix's Goblin #461 - 2010 Base Auto

Rauq
Install the belts first. Then take a 2x4 and jack it up under the car with the carriage bolts in place so that all 4 carriage bolts (or just 2 at a time with a shorter 2x4) are sticking up from the bottom of the floor. Install the mounts onto the seats. Up to you as to whether you tighten the side mounts now or later. With the carriage bolts firmly in place, you can massage the seat mounts with a little more motivation.
 
Fenix Nexen
The seats/seat belts are a tie with the subframe for biggest pain for me during off-season tear-down work.

I hate pulling my seats. It’s always a fight to get them back in.
Install the belts first. Then take a 2x4 and jack it up under the car with the carriage bolts in place so that all 4 carriage bolts (or just 2 at a time with a shorter 2x4) are sticking up from the bottom of the floor. Install the mounts onto the seats. Up to you as to whether you tighten the side mounts now or later. With the carriage bolts firmly in place, you can massage the seat mounts with a little more motivation.

I agree and I had to keep the bolt to the anti-submarine belt loose in order to allow adjustment of it and for it to not fight the seat and when loose the seat is much easier to put in, makes me want to go for a 4 point harness instead.

Other news, I think the car believes that the parking brake is still on, or something, because I cant shift into gear and the BRAKE light on the dash stays on. I have been pulling on the locking solenoid inside the shifter to shift. The key still does not want to be free without also pulling on the solenoid which I have 'fixed' by zip tieing it open

Also worked on front toe to be equal so its ready for an alignment
 

Attachments

  • 1719194673294.png
    1719194673294.png
    1.1 MB · Views: 253
  • 1719194714005.png
    1719194714005.png
    1.1 MB · Views: 266
Last edited:
Sluggonaut
Install the belts first. Then take a 2x4 and jack it up under the car with the carriage bolts in place so that all 4 carriage bolts (or just 2 at a time with a shorter 2x4) are sticking up from the bottom of the floor. Install the mounts onto the seats. Up to you as to whether you tighten the side mounts now or later. With the carriage bolts firmly in place, you can massage the seat mounts with a little more motivation.

I can't install my seatbelts first because the side belts have to feed from the inside of the seat, so the seat has to be somewhat in place to bolt the belts down making it hard to access the seatbelt bolts.

Getting the seats in place is never the issue for me, it's the contortion required to tighten the fasteners. I think the real problem is the combination of using the shorter brackets and where I have the seats mounted in the brackets which makes it a difficult endeavor.
 
Desert Sasqwatch
Believe these issues with installing and removing seats are good reasons to have the floor and side panels bolt on instead of being riveted in place. Aluminum seats with side brackets it is almost a must-have to have enough space to get hardware and your hands into the almost non-existent space (I have some good sized paws myself). :D
 
Chris_WNC
I think the BRAKE indicator is going to stay on because we pulled out all the ABS stuff.
The shift solenoid should actuate with key on and brake pedal pressed. Mine actually stopped working the other day and I'm going to troubleshoot it while I'm replacing my floor pan. I noticed a bare wire at the shifter which is probably my problem.
 
Fenix Nexen
Function over form, a cloth top to keep the sun off, had no plans on actually doing this but its giving me ideas to make one that is legit using prototyping foam, invoice should be coming in soon from what im told, will be having the rest of what i need crated in, hood, fenders, ect

48173
 
Fenix Nexen
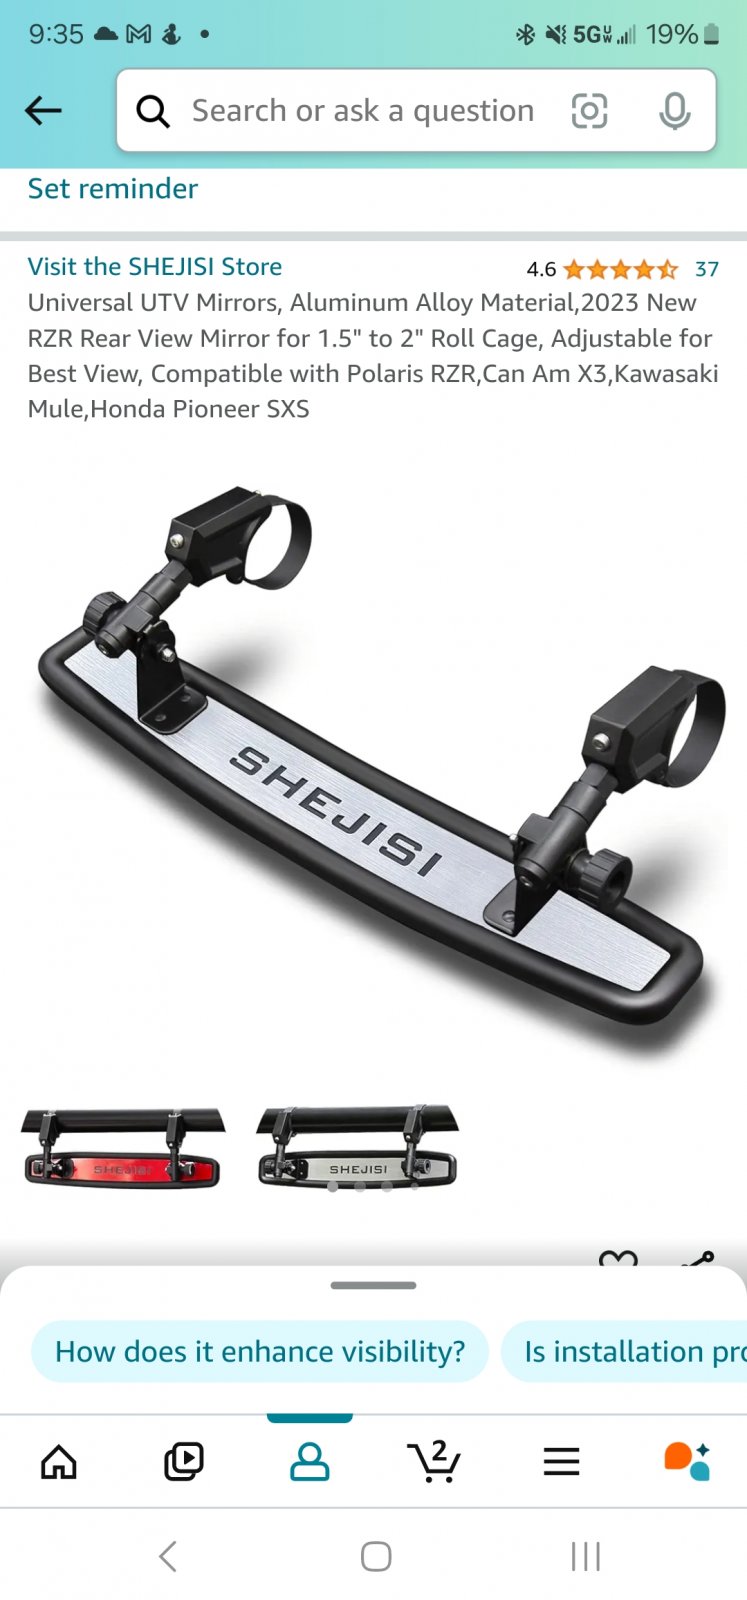
received the invoice wensday and missed it in the mess of my email box, mentioned some needed changes and will receive the amended version soon. ordered a rear view mirror and installed it, i can now see everythingggggg. I am going to change the 'shejisi' company logo on the front with something else, stickers perhaps or my frame number viewable from your rear view mirror (mirrored unless seen by a mirror). A sticker with my frame number would probably be best. Seen in this picture I am using a combo of cardboard and particle wood to make the cloth top taught, everything is secured with zipties, of course.
48192

48193


Another note for any future builders, take your time finding a cheap reliable donor, unlike me I got mine from a stealership, 2010 base auto with 85k miles and paid 7 grand for it. I made this choice as a 'safe bet' that id get a donor with no issues, and i was correct, but the wallet still hurts even after almost 2 years. That means if I ever decide to sell (hopefully never) i will most likely lose out 2 to 5-ish grand unless someone wants to buy it for around 25k~30k.

edit: oh and also do not forget to tighten the jam nuts when you are doing your toe, found out the hard way that the rod can still vibrate and change the toe over time if the jam nut isnt tightened. will have to redo my toe, however iv decided to keep the spacing, so when i get the redrilled hubs ill use spacers and i removed the rack limiters, tight turning angle with no rubbing, yippie! so i will just start the whole alignment process over when it cools off more
 
Mahkoi
I have the same mirror and had the same complaint about the brand name on it. A quick shot with a rattle can makes it way less noticeable but the frame number like you were saying would be cool too. It's been a good mirror hasn't vibrated loose on me yet.

Screenshot_20240712_201900_Gallery.jpg
 
Fenix Nexen
I have the same mirror and had the same complaint about the brand name on it. A quick shot with a rattle can makes it way less noticeable but the frame number like you were saying would be cool too. It's been a good mirror hasn't vibrated loose on me yet.

View attachment 48194

what do you end up using to get the mounts to fit? i had to make shims using rubber and sockets
17208354560452143254681284579332.jpg
 
Mahkoi
Huh, weird I'll go double check. The screw bottoms out, did I receive the wrong screws or am I missing something View attachment 48200

edit: i believe i did receive different screws, to the hardware store i go then

I'm a couple of hours away from my goblin right now so I can't get a good pic but it looks like we may have different hardware, my screws were stainless or uncoated and may have more threads to them.
Screenshot_20240713_111325_Gallery.jpg
 
Back
Top