-
We've upgraded and reskinned the forum. Notice something off? Email us at [email protected] and we'll fix it.
You are using an out of date browser. It may not display this or other websites correctly.
You should upgrade or use an alternative browser.
You should upgrade or use an alternative browser.
V1 Travis B's Track goblin #479 - 08 SS
Desert Sasqwatch
Bigfoot Goblin
- Desert Sasqwatch Bigfoot Goblin
Holy smokes! Somebody used a file on the crank snout, probably to slide the harmonic balancer on more easily. That's not good. I'm surprised the key is not more deformed than it is. The snap ring, what you call the c-clamp, retains the timing chain gear, but it too should be pressed on - unless they filed the crank underneath it too. 
WA08TC
Well-Known Member
- WA08TC Well-Known Member
Ya, well I was able to get the timing sprocket off. Was a pain do to the key shearing off. The balance chain sprocket is fine where it is I was able to pull the woodruff key out and ordered a new one. Also cleaned up the key hole for the new key. My damper was cracked at the side closest to the motor on the key channel. Picked up a new damper. I'll get the new key put in lightly tapping it. Only issues is the timing sprocket and balancer are barely getting on before meeting resistance. Tapping them into place while lining up the key is going to be a pain. Does baking them at 200° for a little bit help? Ideas?

- Gtstorey Goblin Guru
How much of the pulley/dampener rest on the damaged snout?
You typically have to use a bolt or the proper tool to install a damper. This usually isn't a tap it on fit. Often there isn't a key and it's an interference fit that takes a lot to get it on. At least yours is keyed. I'm not sure that is normal on an ecotec. The LS engines are almost always interference fit only.
You typically have to use a bolt or the proper tool to install a damper. This usually isn't a tap it on fit. Often there isn't a key and it's an interference fit that takes a lot to get it on. At least yours is keyed. I'm not sure that is normal on an ecotec. The LS engines are almost always interference fit only.
WA08TC
Well-Known Member
WA08TC
Well-Known Member
- WA08TC Well-Known Member
Got the short block back this morning. Had him also tap the turbo oil feed on the block this time instead of using the head. Started assembly about 10am with a fresh Bluetooth speaker and some Maui Brewing pineapple mana. New crank and nudged in the woodruff key. Sprockets and balancer slid on like butter with some slight wiggling. New factory head with my 82# springs moved over. Boundary billet oil pump gears installed as well. Got a lot done in about 7 hours. I was surprised how easy I was able to get the f23 mated usually I'm struggling for a while. Remembered the spacer too, took about 10 min with the motor on a furniture dolley and the trans on a hoist. Tomorrow I'll get the subframe in and tie up all the connectors and vacuum hoses. Tomorrow or Friday get her broken in. I promise this time.


WA08TC
Well-Known Member
- WA08TC Well-Known Member
When it rains it pours. Car idles for a a few seconds then the crank pulley mists and throws oil. Everywhere. No leaks that I can see but with talking to my tuner and Justin Reed consensus is the crank seal in the timing cover. Rock auto timing cover looks fine but never know. Didn't have this issue when I ran the motor a couple weeks ago before the crankshaft replacement But maybe just a fluke. Also don't have the dowel pins on the timing cover which can contribute to the crankshaft seal not being center on the crank. Motor didn't come with them. Sounds like a need to put dowel pins in, and replace the crank seal.
Anyone got a hook on finding those timing cover dowels be is spares or size?
Anyone got a hook on finding those timing cover dowels be is spares or size?
Rauq
Goblin Guru
- Rauq Goblin Guru
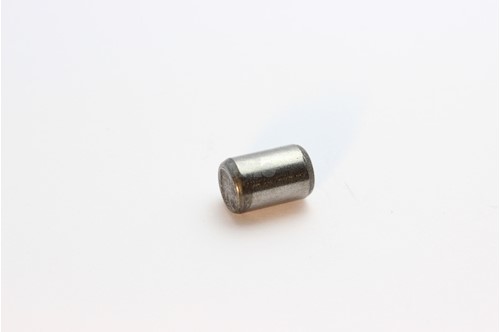
22531637 by OES | Pin
22531637 by SAAB | Pin | Fits Saab 9-3, Saab 9-4X, Saab 9-5 | eSaabParts: Saab Parts, Done Right.
I've found esaabparts to be the best at finding Ecotec engine parts with useful diagrams, the part number should cross over to the rest of the GM world. If that page doesn't come up with an applicable diagram for you, try switching at the bottom to:
Cylinder Block -> 9-3 (9440) ->2003-2011 [B207R ~ LSJ], or
Oil Pump 2.0T 4-Cyl -> 9-5 (650) ->2010-2012 [A20NHT ~ LDK]
Some of those other diagrams make it look like it's the same dowel that locates the oil pan so that might be another way you could come up with replacements.
WA08TC
Well-Known Member
- WA08TC Well-Known Member
I appreciate it. I'll look into to the site you posted as well. One of the diagrams shows it in the front with the timing cover. If you can't get em out I'll order a pair. Hoping the dowels and a new crank seal fixes it. Was coming out good. Don't know what else it could be unless the aftermarket balancer snout is crap. The grooves look a little different then the OEM one but the snout length and size that the seal rest on are the same.Actually you know what I have a scrap block in my garage right now (other project), let me see if I can pull a couple out. No guarantees I'll be able to get back to you on that today, though.
Last edited:
Desert Sasqwatch
Bigfoot Goblin
- Desert Sasqwatch Bigfoot Goblin
Nice! Always good to hear about tuning changes that make a difference - and don't cause meltdowns! Assume you got the timing cover and damper/pulley back on with no leaks? BTW, when are going to lay that windshield back a few degrees? It looks unnatural standing bolt upright. 

WA08TC
Well-Known Member
- WA08TC Well-Known Member
Ya everything is back together no leaks, swapped the timing cover gasket and crank seal all good. Need to look into tilting the windshield back.Nice! Always good to hear about tuning changes that make a difference - and don't cause meltdowns! Assume you got the timing cover and damper/pulley back on with no leaks? BTW, when are going to lay that windshield back a few degrees? It looks unnatural standing bolt upright.
Desert Sasqwatch
Bigfoot Goblin
- Desert Sasqwatch Bigfoot Goblin
Great news. Expect to see some updates on your tuning adventure. Just be forwarned that some will want to see dyno or track receipts for HP numbers. 
I've got the windshield lay back information scattered around in the middle of my build log, or you could IM me and I can get you the steps that are needed to do it the easy (and correct) way. Same angle as the a-pillar and curved to give it some added strength.
I've got the windshield lay back information scattered around in the middle of my build log, or you could IM me and I can get you the steps that are needed to do it the easy (and correct) way. Same angle as the a-pillar and curved to give it some added strength.
Similar threads
- Replies
- 168
- Views
- 18K