New Gearbox / Clutch Upgrade Procedure

GoblinGuyZ

Well-Known Member
Sooo please tell me I’m doing something wrong. I have spent the last hour and a half literally trying to get the clip back into the clutch elbow. I have tried every angle and tool and method. Everything works as it should separated but it just won’t go any further than half way. What should be a 30 second job has turned into hours and I’m no closer. I’m about to just shove a piece of wire in there to retain it. Tell me I’m overlooking something obvious altho i can’t tell what.

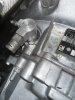
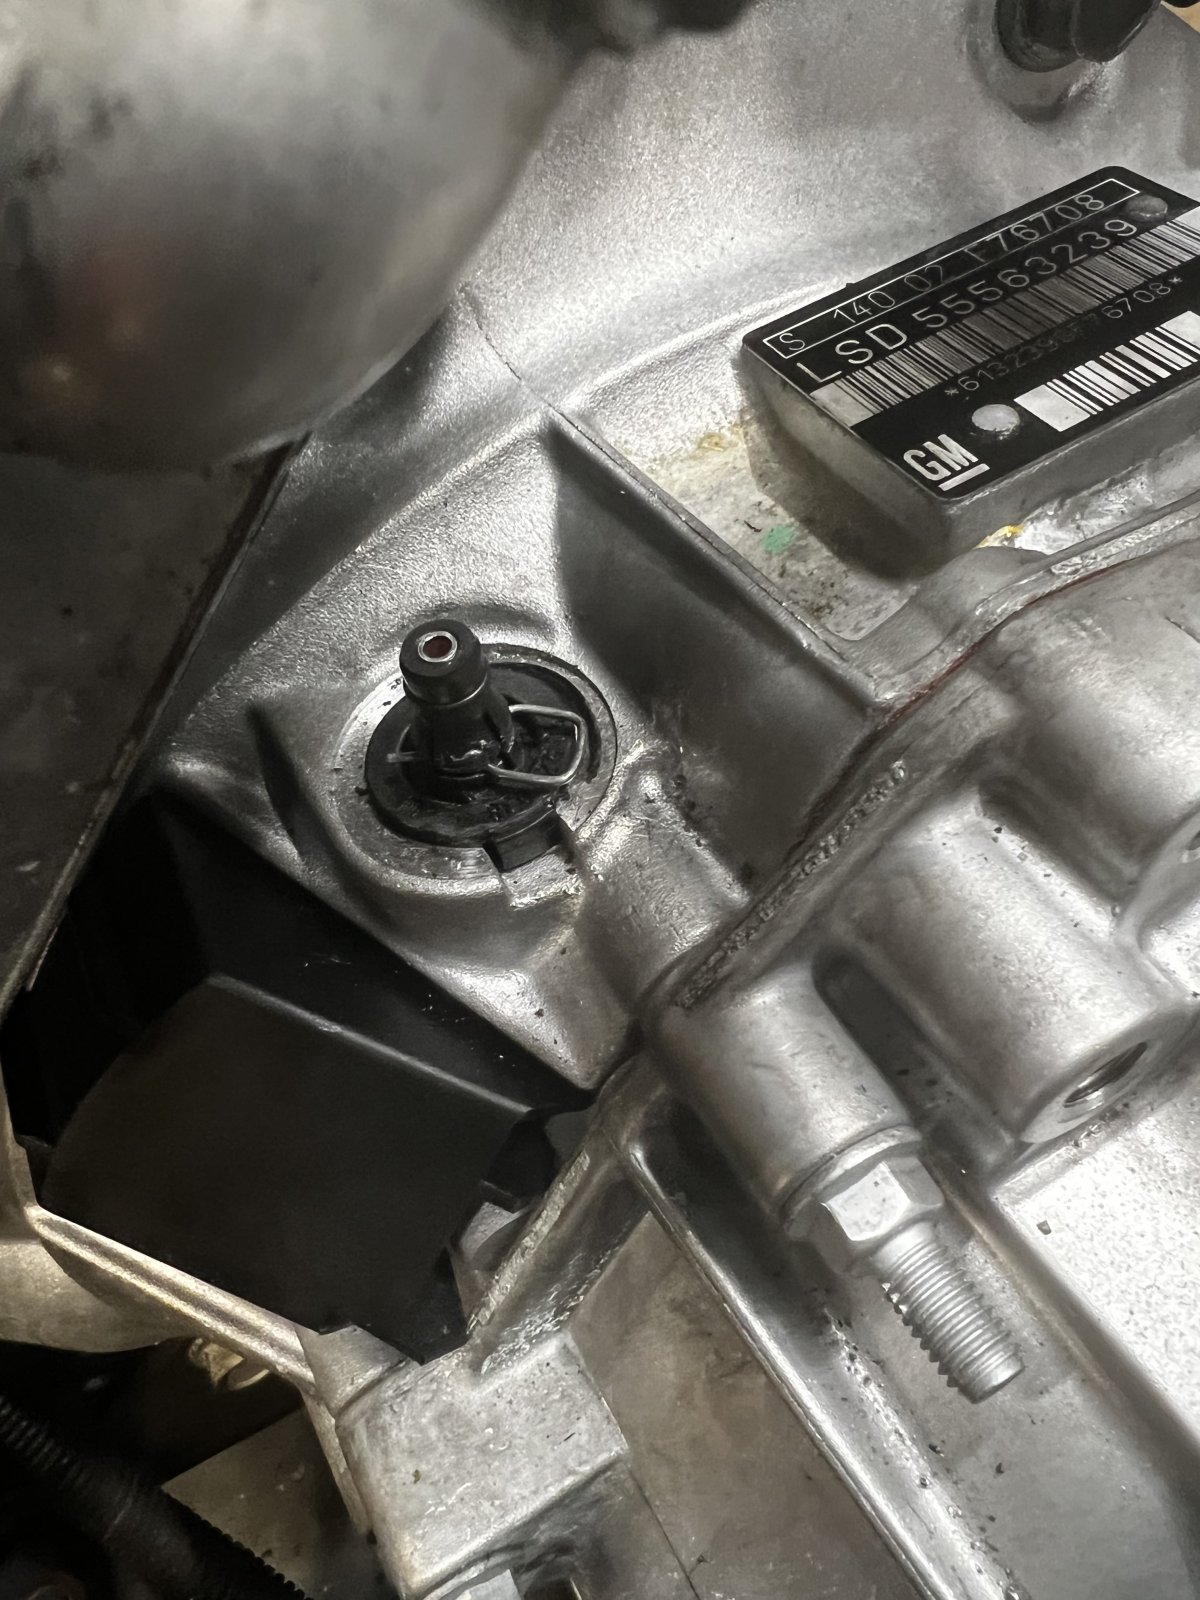
This is as far in as i can get it. It catches the plastic piece in the second pic but I can’t get it through to the other side. I’ve tried bending it, straightening it, squeezing it, wiggling up and down and side to side

46274
 

Attachments

GoblinGuyZ

Well-Known Member
Does this help? I don't see anything obvious that is wrong.
thanks but I’m fairly sure I’m doing everything right and it’s not like it’s rocket science. I’ve built entire cars and engines and bikes etc so this has me feeling like quite a fool lol. I’m not sure if the elbow base is slightly warped maybe previous owner played around with it on install cause it does look a little off and seems it won’t line up at all. I even tried installing it back onto the old box which is out of the car and I couldn’t get it to come through there either so I think something is screwed. Anyway I’ll order a new elbow and clip. For the time being I pushed a similarly sized slip / cotter pin through one side and it feels pretty secure if i yank on it a bit so will see what happens. Thanks again
 

ah.b.normal

Goblin Guru
thanks but I’m fairly sure I’m doing everything right and it’s not like it’s rocket science. I’ve built entire cars and engines and bikes etc so this has me feeling like quite a fool lol. I’m not sure if the elbow base is slightly warped maybe previous owner played around with it on install cause it does look a little off and seems it won’t line up at all. I even tried installing it back onto the old box which is out of the car and I couldn’t get it to come through there either so I think something is screwed. Anyway I’ll order a new elbow and clip. For the time being I pushed a similarly sized slip / cotter pin through one side and it feels pretty secure if i yank on it a bit so will see what happens. Thanks again
OK! Deep cleansing breath, hold it and exhale slowly. Yup, that fixed nothing.,,,,,, Now, a couple of things that bused my chops. The aluminum block should have the clip FULLY inserted while trying to install. This is a quick assembly line connection, so the clip IS NOT pushed in AFTER coupling! The bottom of the block has a raised semi circular area that will only allow it to engage the clutch pipe nipple in one position! Try disconnecting the aluminum block from the feed hard line so you can rotate the block while pushing down on the block to engage. I suspect this problem is actually caused by leaving the steel line installed while installing the distribution block. The original Cobalt clutch line is very flex-able and twisting during install is easy. The bleed device usually points straight forward, but snap it into place and it should easily rotate into proper position.
 

GoblinGuyZ

Well-Known Member
OK! Deep cleansing breath, hold it and exhale slowly. Yup, that fixed nothing.,,,,,, Now, a couple of things that bused my chops. The aluminum block should have the clip FULLY inserted while trying to install. This is a quick assembly line connection, so the clip IS NOT pushed in AFTER coupling! The bottom of the block has a raised semi circular area that will only allow it to engage the clutch pipe nipple in one position! Try disconnecting the aluminum block from the feed hard line so you can rotate the block while pushing down on the block to engage. I suspect this problem is actually caused by leaving the steel line installed while installing the distribution block. The original Cobalt clutch line is very flex-able and twisting during install is easy. The bleed device usually points straight forward, but snap it into place and it should easily rotate into proper position.
Thanks. Knowing this is how it’s supposed to install is helpful. I first assumed that but could not get it in thay way either lol. So that’s when I figured I was doing something wrong and I needed to push it in the way it came out. Yes I noticed the two alignment notches from the start so was making sure they lined up. I’ll try again but even pushing down with all my might I couldn’t get it to drop down and click in place and not exactly the type of thing you want to take a hammer to. I’ll give it another go and see. Appreciate the info. P.S. several deep breaths have been taken
 

Gtstorey

Goblin Guru
Make sure nothing is in aluminum block. Mine installed with the original oring in the block and a new one on the nipple. Took forever for me to figure the leak.
 

GoblinGuyZ

Well-Known Member
Thanks. Knowing this is how it’s supposed to install is helpful. I first assumed that but could not get it in thay way either lol. So that’s when I figured I was doing something wrong and I needed to push it in the way it came out. Yes I noticed the two alignment notches from the start so was making sure they lined up. I’ll try again but even pushing down with all my might I couldn’t get it to drop down and click in place and not exactly the type of thing you want to take a hammer to. I’ll give it another go and see. Appreciate the info.
Make sure nothing is in aluminum block. Mine installed with the original oring in the block and a new one on the nipple. Took forever for me to figure the leak.
Yeah that happened to me first try as well but I realised right after so I removed it. I cleaned it out fully as well
 
Top