
-
We've upgraded and reskinned the forum. Notice something off? Email us at [email protected] and we'll fix it.
You are using an out of date browser. It may not display this or other websites correctly.
You should upgrade or use an alternative browser.
You should upgrade or use an alternative browser.
V1 Matt C's Street Goblin - Extended Frame #355 - 06 LS Donor


Matt C
Active Member

- Matt C Active Member
Got lots done since my last entry.
DF sent me the new transmission cable brackets. got that mounted and the cables installed and adjusted. Shifts really good now.
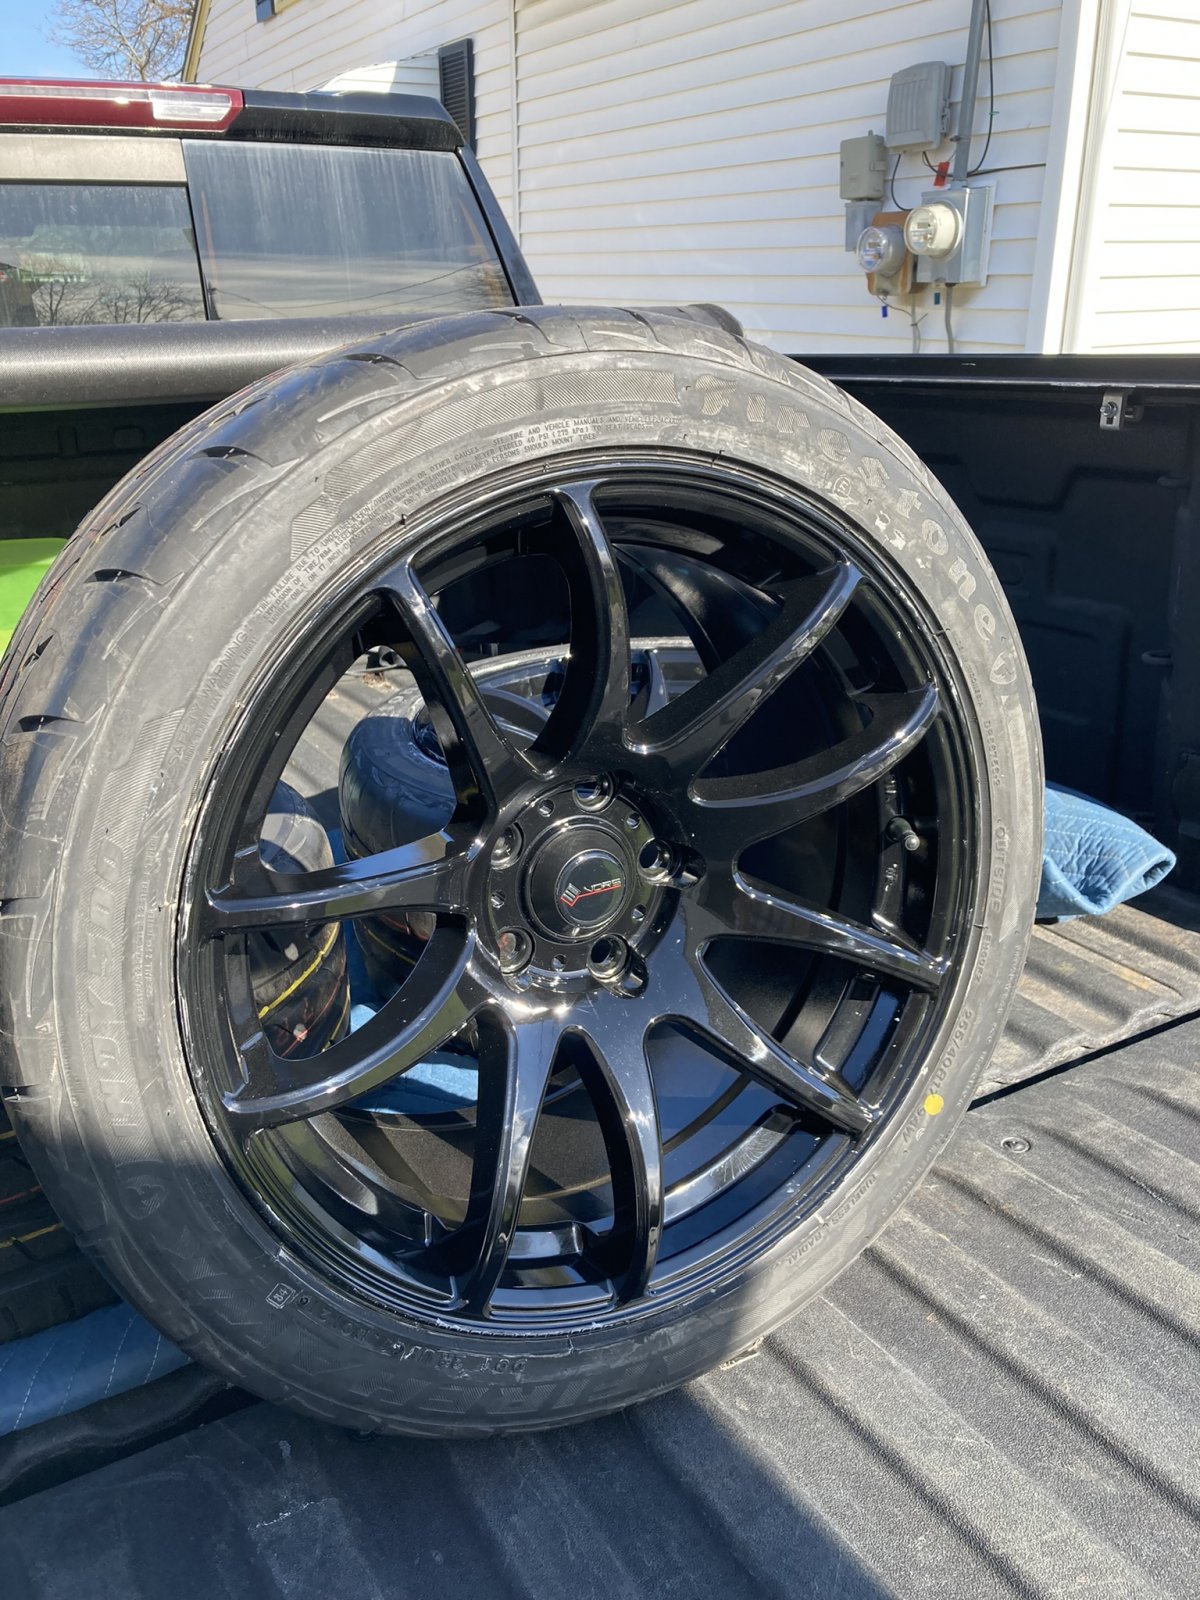
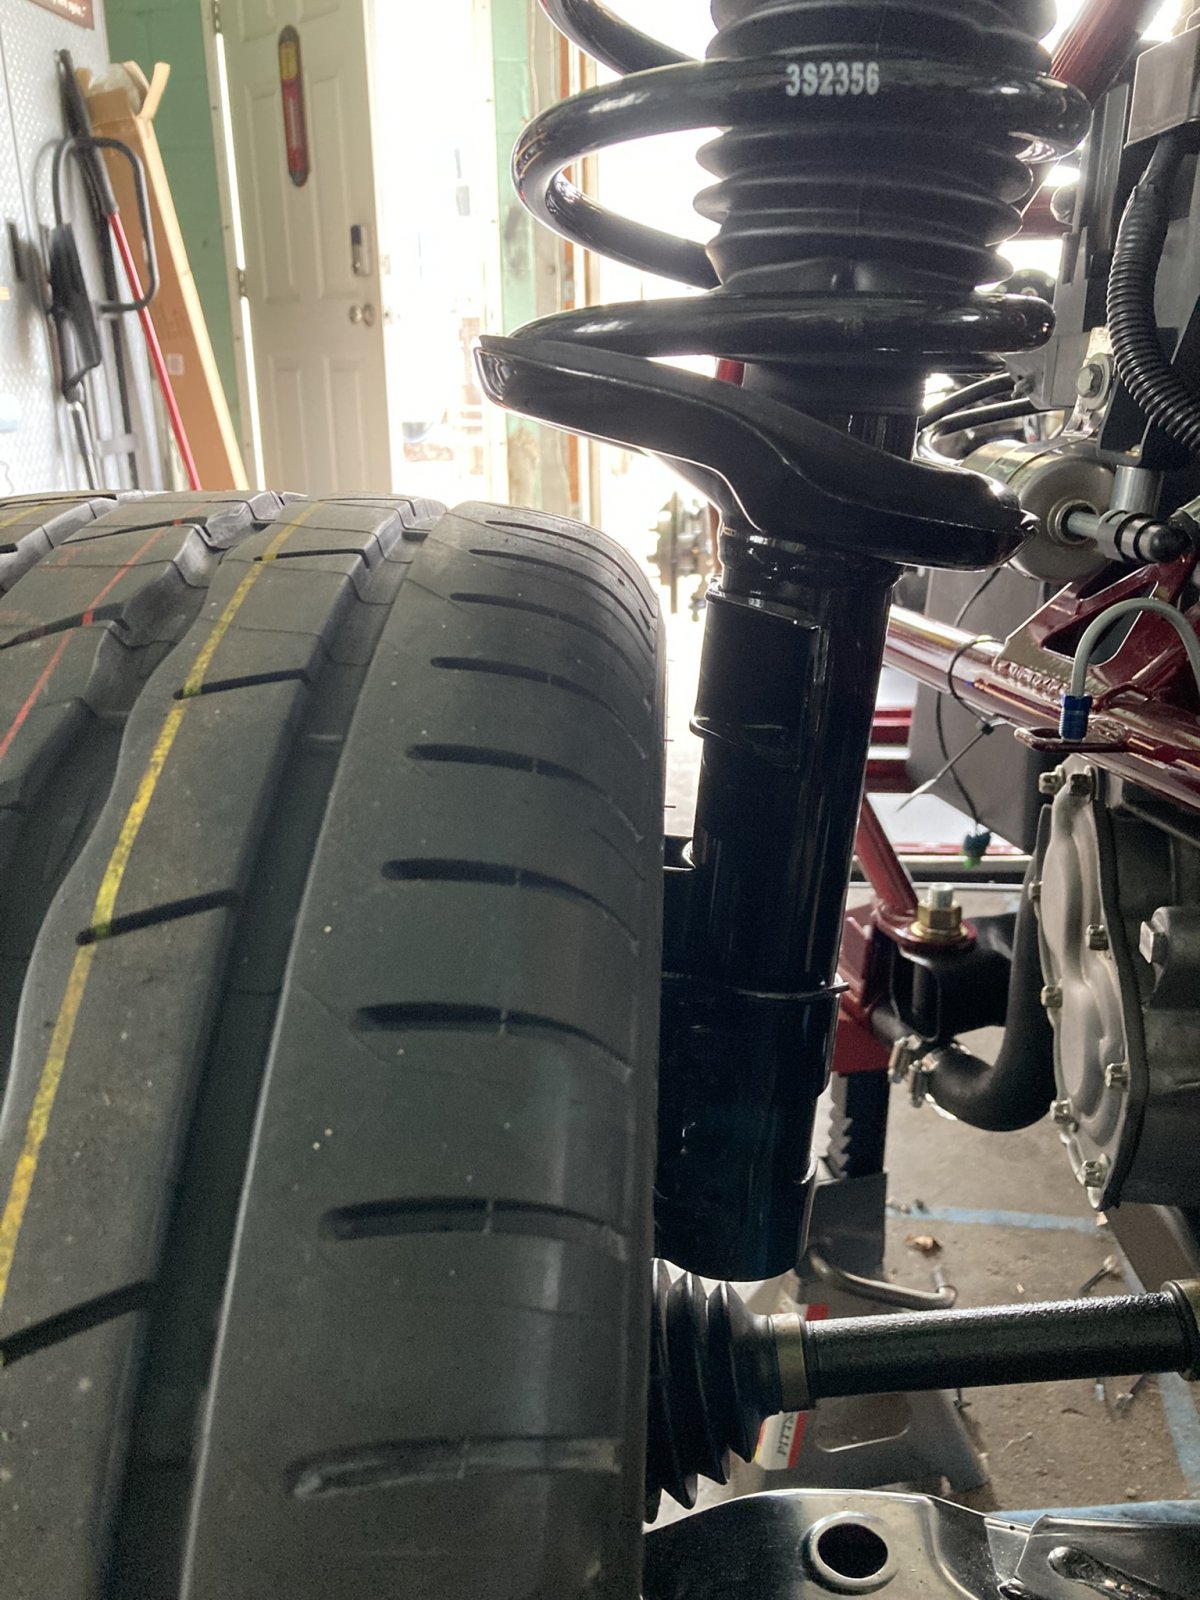
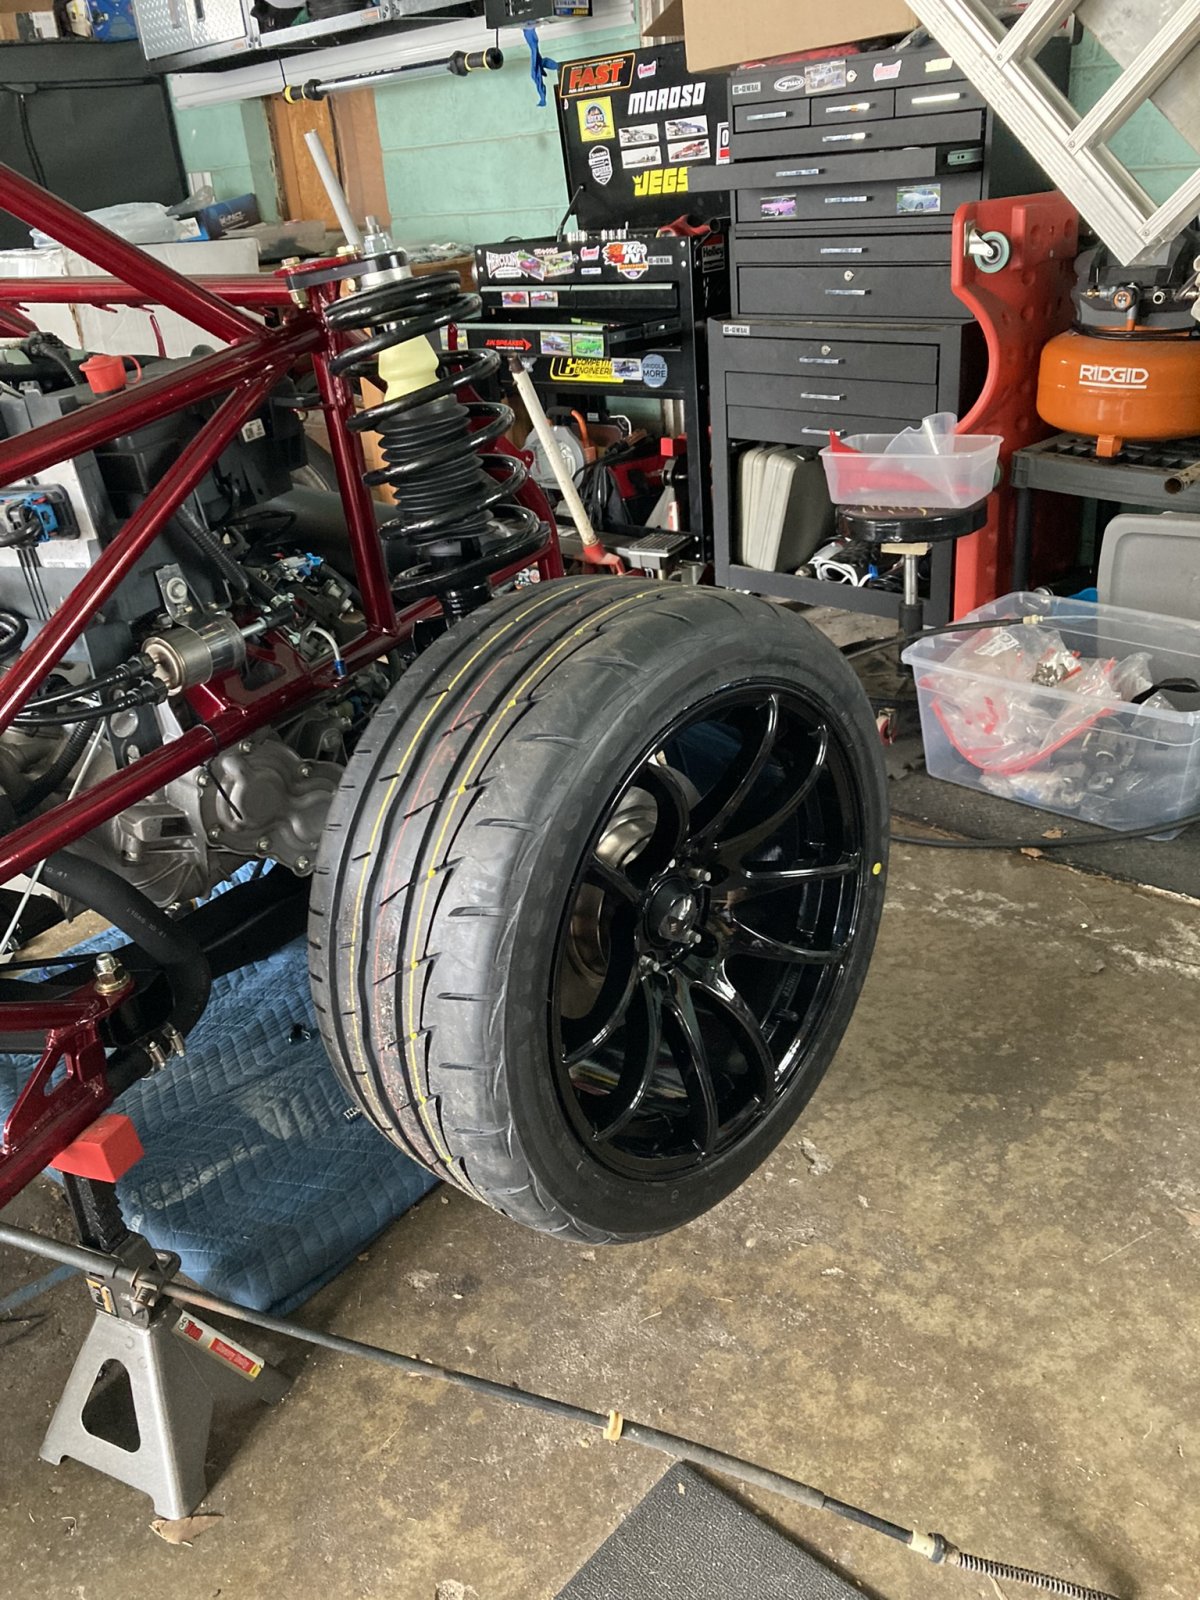
After what seems to be countless hours researching tire/wheel combinations, I finally settled on Vors TR4s 17x9 with 30mm offset. I mated those with Firestone Firehawk Indy 500 255/40R17 tires. I wasn't sure how well this would fit with the stock Cobalt struts since the spring and seat sit are much larger than the BC coilovers. Thankfully, they fit great, and no need for any spacers. They clear the strut shaft and spring seat perfectly.
Installed all the brake lines and brakes. It seemed like it took forever to bleed all the brake lines. There was always just a little bit of air each time. I think I got it all. The brakes work, but haven't drove it yet to see how they feel.
Clutch line bled.
Secured the intake to the frame so it wasn't flopping around.
Got the rear firewall installed.
Got the parking brake handled cleaned up, painted and installed. Also mounted the parking brake tubes. I'm still wondering if my donor's parking brake cable will work, since it was for a drum brake and has the large spring at the end. Some of the other pictures I've seen must have been for the SS versions as they don't seem to have that spring.
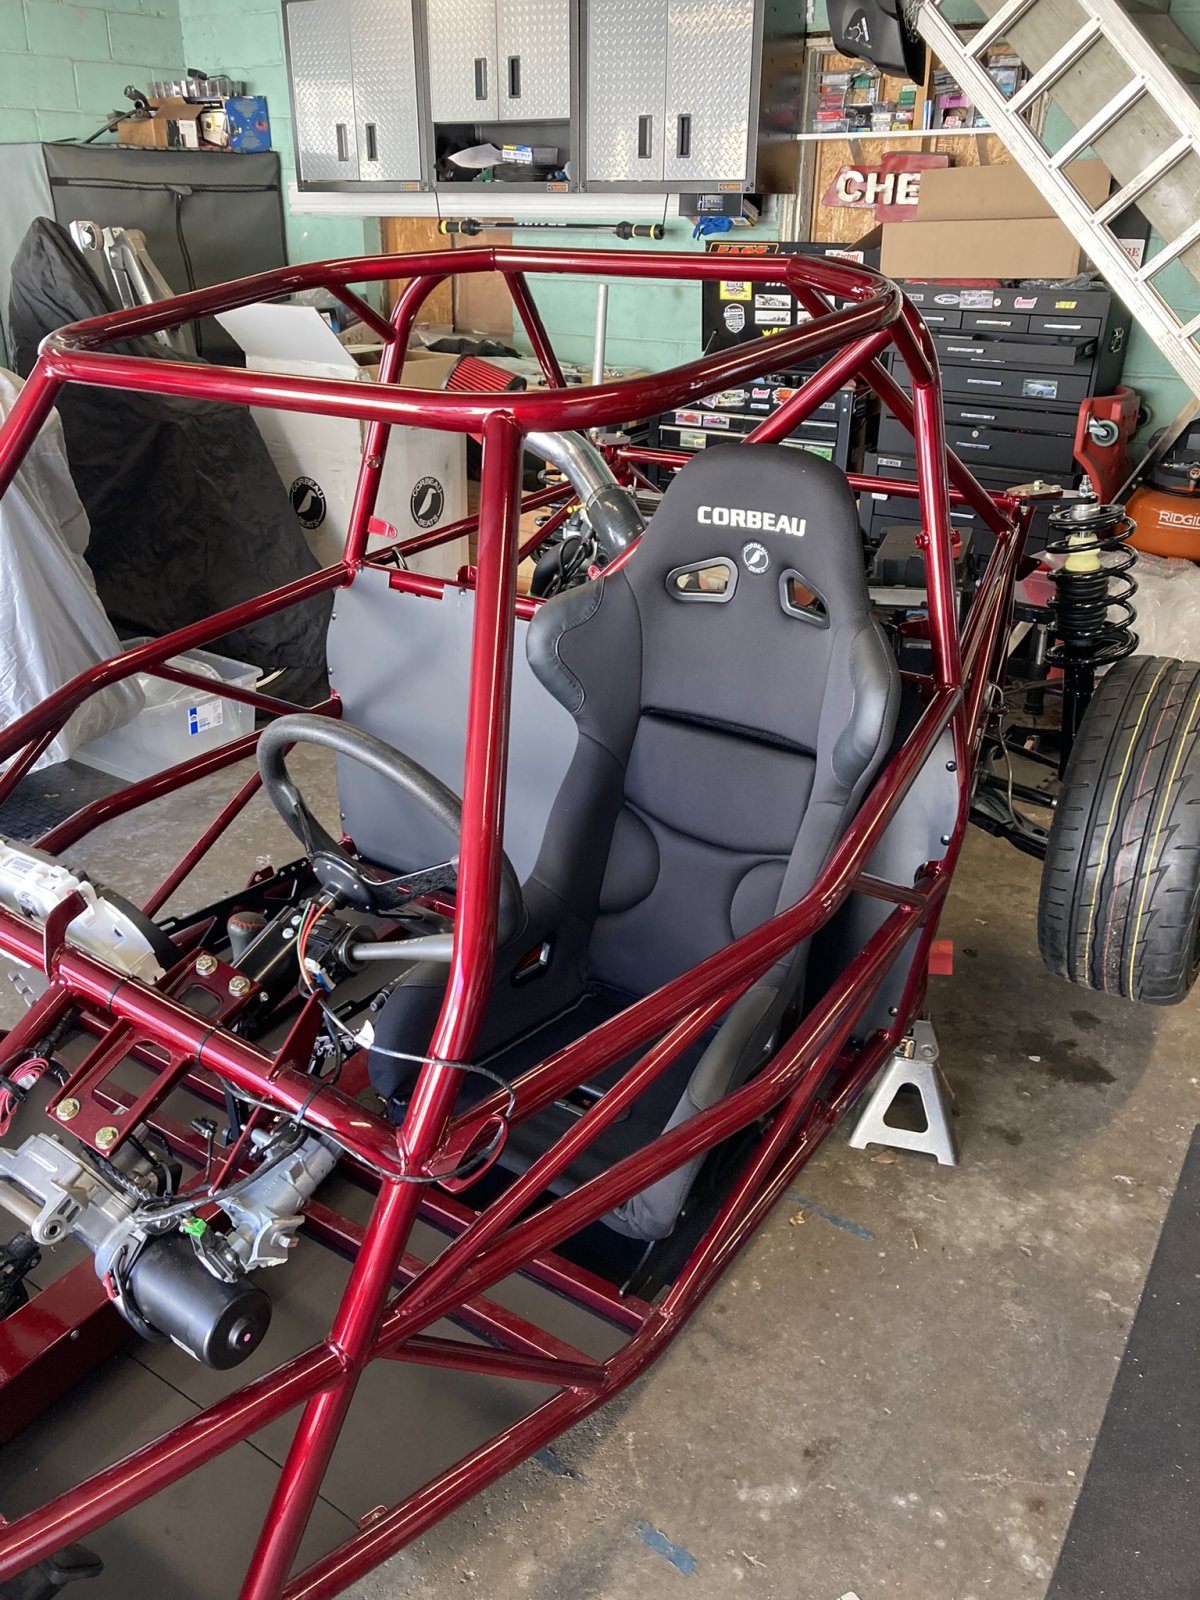
Finally opened the Corbeau box I had in the garage for 2 months. Got the driver side seat installed and 5 point harness installed and adjusted. I feel like it takes 5 minutes to get the seat belts on.
I've got Friday off, so I'm shooting for my first drive around the block then. So far (knock on wood), then engine has been running nice and smooth each time it's fired up. Going to change the oil in it before the first drive to clear out any gunk from the rebuild, then change it again in about 500 miles.
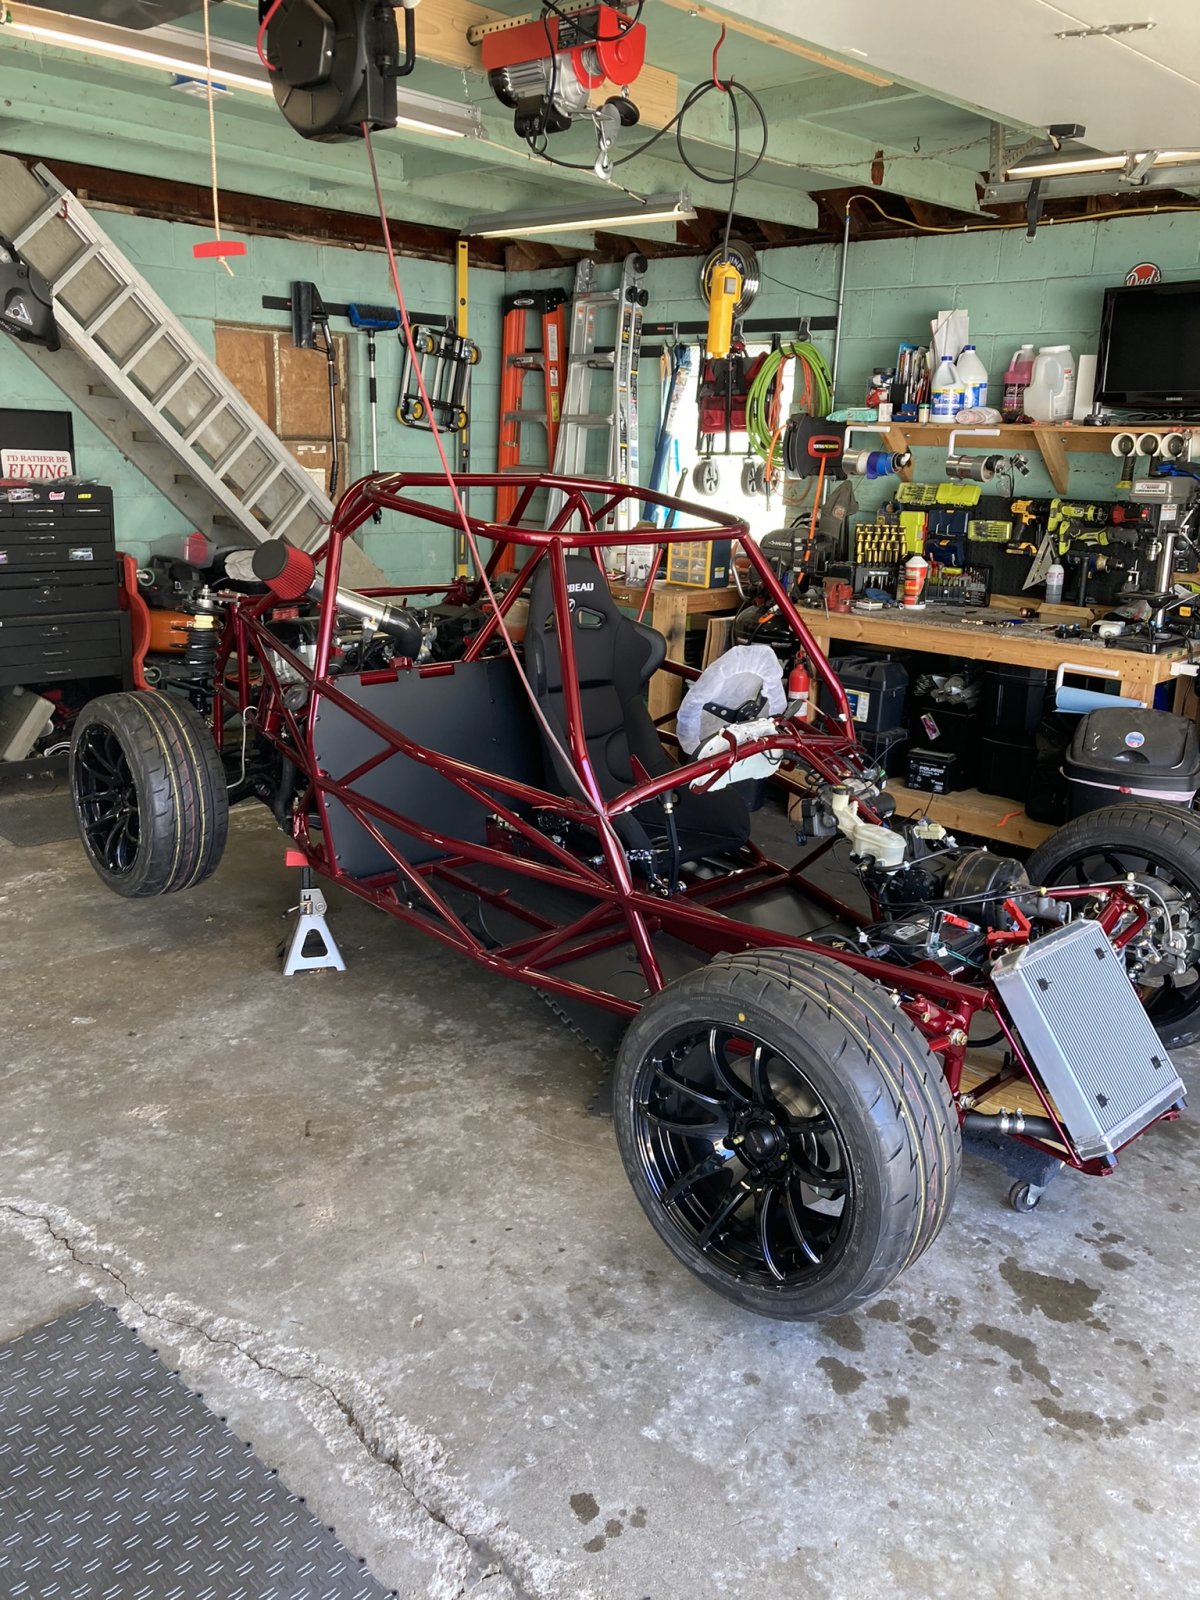
Just ordered the final stage and the upgraded DF steering wheel. After getting in and out a few times adjusting the seat belts, it's not the easiest for me to get in and out with the steering wheel in place. The new quick disconnect will be nice.
Been doing some research on headlight options. I think I'm going to give these a try. I hope they don't look to big.
Now I need to start the registration process. It's sounding like the Michigan State inspectors aren't taking as long as advertised. Hopefully I can get some use out of it this summer (legally).
The pictures members post on this forum have been a life saver. I try to post as many pictures as I can to pay it forward. If anyone needs a closer up picture of anything, let me know!!
DF sent me the new transmission cable brackets. got that mounted and the cables installed and adjusted. Shifts really good now.
After what seems to be countless hours researching tire/wheel combinations, I finally settled on Vors TR4s 17x9 with 30mm offset. I mated those with Firestone Firehawk Indy 500 255/40R17 tires. I wasn't sure how well this would fit with the stock Cobalt struts since the spring and seat sit are much larger than the BC coilovers. Thankfully, they fit great, and no need for any spacers. They clear the strut shaft and spring seat perfectly.
Installed all the brake lines and brakes. It seemed like it took forever to bleed all the brake lines. There was always just a little bit of air each time. I think I got it all. The brakes work, but haven't drove it yet to see how they feel.
Clutch line bled.
Secured the intake to the frame so it wasn't flopping around.
Got the rear firewall installed.
Got the parking brake handled cleaned up, painted and installed. Also mounted the parking brake tubes. I'm still wondering if my donor's parking brake cable will work, since it was for a drum brake and has the large spring at the end. Some of the other pictures I've seen must have been for the SS versions as they don't seem to have that spring.
Finally opened the Corbeau box I had in the garage for 2 months. Got the driver side seat installed and 5 point harness installed and adjusted. I feel like it takes 5 minutes to get the seat belts on.
I've got Friday off, so I'm shooting for my first drive around the block then. So far (knock on wood), then engine has been running nice and smooth each time it's fired up. Going to change the oil in it before the first drive to clear out any gunk from the rebuild, then change it again in about 500 miles.
Just ordered the final stage and the upgraded DF steering wheel. After getting in and out a few times adjusting the seat belts, it's not the easiest for me to get in and out with the steering wheel in place. The new quick disconnect will be nice.
Been doing some research on headlight options. I think I'm going to give these a try. I hope they don't look to big.
Now I need to start the registration process. It's sounding like the Michigan State inspectors aren't taking as long as advertised. Hopefully I can get some use out of it this summer (legally).
The pictures members post on this forum have been a life saver. I try to post as many pictures as I can to pay it forward. If anyone needs a closer up picture of anything, let me know!!


PaulPerger
Well-Known Member

- PaulPerger Well-Known Member
Harnesses become second nature once you get used to them.
Speaking of harnesses, you don't have yours shown in the photos, but I don't see a harness bar. Where did you mount your shoulder harnesses?
PS - Are you a pilot?
Speaking of harnesses, you don't have yours shown in the photos, but I don't see a harness bar. Where did you mount your shoulder harnesses?
PS - Are you a pilot?
Last edited:

Trail_Creeper
Well-Known Member

- Trail_Creeper Well-Known Member
Since it was brought up. Has anyone looked into using an aftermarket Cobalt harness bar? Would that even be an option in the Goblin?
PaulPerger
Well-Known Member
- PaulPerger Well-Known Member
Since it was brought up. Has anyone looked into using an aftermarket Cobalt harness bar? Would that even be an option in the Goblin?
I have not looked, but I would imagine it is not an option. An aftermarket Cobalt harness bar would be designed to mount to the Cobalt geometry, shape, and pilars, all of which are different in the Goblin. IF it is possible, I am pretty sure it would require some serious modification to make it work.
- Gtstorey Goblin Guru
I don't see anyway (or any reason) to use a harness bar designed for a cobalt or any other car, other than cutting the ends off and welding in place.Since it was brought up. Has anyone looked into using an aftermarket Cobalt harness bar? Would that even be an option in the Goblin?
I think most of us that has added a separate harness bar has welded in 1.5" steel tube at the right height. I think mine is about 4" higher than the existing horizontal bar in the rear loop, but that will vary a little by how tall you are and what your seat height is.
Matt C
Active Member
- Matt C Active Member
Here you go. I wrapped both shoulder harnesses around the upper bar behind the seat, then rolled and secured the excess strap. This video was really helpful. Start it around 12:30.Harnesses become second nature once you get used to them.
Speaking of harnesses, you don't have yours shown in the photos, but I don't see a harness bar. Where did you mount your shoulder harnesses?
PS - Are you a pilot?
Yeah, I'm a pilot. I used to fly for a living, but have since changed careers to be home with family more. I still fly sometimes for fun.
Attachments

- Gtstorey Goblin Guru
Mounting to the stock bar violates one of the rules for harnesses which is the angle of the rear straps should be mounted at 45 degrees or less from horizontal. In a crash, if the angle is more, then the straps can cause compression on your back as you are thrown forward (at least in theory). Also, depending on how short you are, as you are thrown forward in a crash, the seat belt will loosen if the seat back breaks as the straps pull down on them.
Installing A 5-Point Harness Properly (dragzine.com)
It is crucial that the belt path from the attachment point in the vehicle (floor pan for lap belt or roll bar for shoulder harness) not be hindered or redirected by the seat prior to going over your body. The forces during an impact are immense and these 3-inch-wide belts are designed to help you withstand an impact. However, if the belt is redirected by a seat, then as the belt straightens out during a crash it can break the seat and then create slack in the belt which means you move forward and your body runs into stuff — hard stuff — like the steering wheel or windshield. Bad for your face.
According to Rick White, co-owner of Autopower Industries, a very critical item to installing any 5-point harness correctly is the angle of the shoulder harness behind the driver. “If the harness is too low (i.e. attached to the floor pan near the rear seat), in a collision the belts will compress the driver’s spine causing injury,” he says. “It is better to have the belts as close to level as possible to the driver’s shoulder height. This is properly done with a harness bar, a roll bar, or roll cage in combination with the seat height.”
Installing A 5-Point Harness Properly (dragzine.com)
It is crucial that the belt path from the attachment point in the vehicle (floor pan for lap belt or roll bar for shoulder harness) not be hindered or redirected by the seat prior to going over your body. The forces during an impact are immense and these 3-inch-wide belts are designed to help you withstand an impact. However, if the belt is redirected by a seat, then as the belt straightens out during a crash it can break the seat and then create slack in the belt which means you move forward and your body runs into stuff — hard stuff — like the steering wheel or windshield. Bad for your face.
According to Rick White, co-owner of Autopower Industries, a very critical item to installing any 5-point harness correctly is the angle of the shoulder harness behind the driver. “If the harness is too low (i.e. attached to the floor pan near the rear seat), in a collision the belts will compress the driver’s spine causing injury,” he says. “It is better to have the belts as close to level as possible to the driver’s shoulder height. This is properly done with a harness bar, a roll bar, or roll cage in combination with the seat height.”
Last edited:
PaulPerger
Well-Known Member
- PaulPerger Well-Known Member
Mounting to the stock bar violates one of the rules for harnesses which is the angle of the rear straps should be mounted at 45 degrees or less from horizontal. In a crash, if the angle is more, then the straps can cause compression on your back as you are thrown forward (at least in theory). Also, depending on how short you are, as you are thrown forward in a crash, the seat belt will loosen if the seat back breaks as the straps pull down on them.
Installing A 5-Point Harness Properly (dragzine.com)
It is crucial that the belt path from the attachment point in the vehicle (floor pan for lap belt or roll bar for shoulder harness) not be hindered or redirected by the seat prior to going over your body. The forces during an impact are immense and these 3-inch-wide belts are designed to help you withstand an impact. However, if the belt is redirected by a seat, then as the belt straightens out during a crash it can break the seat and then create slack in the belt which means you move forward and your body runs into stuff — hard stuff — like the steering wheel or windshield. Bad for your face.
According to Rick White, co-owner of Autopower Industries, a very critical item to installing any 5-point harness correctly is the angle of the shoulder harness behind the driver. “If the harness is too low (i.e. attached to the floor pan near the rear seat), in a collision the belts will compress the driver’s spine causing injury,” he says. “It is better to have the belts as close to level as possible to the driver’s shoulder height. This is properly done with a harness bar, a roll bar, or roll cage in combination with the seat height.”
Actually 45 degrees (to the back of the seat or person) would potentially be dangerous. I have always read and practiced mounting within 10 degrees of horizontal to the back of the seat or horizontal to the floorline at driver's shoulder level.
- Gtstorey Goblin Guru
You are probably right about the 45 Degrees being to much. I'm not sure where I came up with that number. It might have been a misinterpretation of something similar to your lower image.Actually 45 degrees (to the back of the seat or person) would potentially be dangerous. I have always read and practiced mounting within 10 degrees of horizontal to the back of the seat or horizontal to the floorline at driver's shoulder level.
View attachment 32454
View attachment 32455
PaulPerger
Well-Known Member
- PaulPerger Well-Known Member
You are probably right about the 45 Degrees being to much. I'm not sure where I came up with that number. It might have been a misinterpretation of something similar to your lower image.
The difficult thing is, as that image depicts well, 45 degrees is too much for any belt. For lap belts, there is a "45 degree" window of safe mounting, but it is really within 22.5 degrees fore or aft of where the belt crosses the hip. Shoulder harnesses though should be within 10 degrees of horizontal to the back of the seat. Many racing seats are mounted at an angle, which contributes to the belt angle in relation to the floor line, which is why I always use the back of the seat as my guide point from where I will measure a safe angle.
Matt C
Active Member
- Matt C Active Member
First time outside. Took it for a spin around the block. Brakes and clutch work great now. Still need to do some more fine tuning to the alignments and install the steering limiter. Started the registration process with Michigan. Got the TR-54 form signed. Just waiting on the MCO from DF, then off to the Secretary of States office to get an inspection scheduled.
Also waiting on stage 3 to ship. Need to start thinking of a color/wrap scheme for the hood.
Also waiting on stage 3 to ship. Need to start thinking of a color/wrap scheme for the hood.
Attachments


Matt C
Active Member
- Matt C Active Member
So, something weird happened while I was working on the Goblin tonight. I was installing my button panels and testing the hazards. I noticed both front blinkers weren’t working. They don’t work at all now, even with the normal turn signal switch. I haven’t drove it in a few weeks, but when I did, they worked fine. Anyone else come across this issue of them randomly stop working?
I’ll be checking the mirror light wiring this weekend.
I’ll be checking the mirror light wiring this weekend.


Matt C
Active Member
- Matt C Active Member
Yeah, that’s what I thought too, but I was really careful. I also just checked every single fuse and they’re all good.Since you were messing with the button panel, the hazard lights are on the panel. It’s possible you hit ground and popped a fuse. I would check those first.
Similar threads


- Replies
- 13
- Views
- 333


