Kit Car Build Update: Kit Arrival, Inspiration, and Next Steps!
Hey everyone!
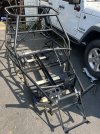
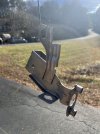
I’ve got some updates to share since my last post—my kit has officially arrived! Watching the truck with the crane unload everything was an unforgettable experience, even if it was absolutely freezing outside. It’s been brutally cold ever since, so I haven’t spent much time in the garage, but the excitement is still sky-high.
Here’s what I’ve been up to:
The Arrival
Unpacking the boxes was like opening presents on Christmas morning. So many parts! I stacked everything neatly under my harness table for now, but I couldn’t resist opening a couple of boxes. The DF steering wheel is an absolute showstopper—seriously, it’s a work of art. My family was watching as I unboxed it, and they all agreed this car
needed a fancy wheel. They were a little jealous, not gonna lie!
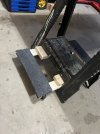
I’ve reached out to DF about the seats to confirm a few details, but so far, it looks like everything else is in order.
Design Plans: The Jolly Roger
One of the things I’ve been thinking a lot about is the theme and color scheme for the Goblin. I’ve decided to go with a
Jolly Roger design as a tribute to my grandfather, Roger, who was a huge influence in my life. But I’m giving it my own twist by combining nautical and locomotive elements with a bit of my love for anime (think One Piece vibes).
Some ideas I’m playing around with:
- Spoiler: Side fins shaped like anchors.
- Rope Elements: Incorporating rope-inspired designs into the aesthetic.
- Custom Jolly Roger Flag: A design that features some of my grandfather’s favorite things, as well as my own.
It’s still a work in progress, but I’m so excited to make this unique and meaningful.
Color and Coating Decisions
The consensus seems to be that powder-coating the frame is a must, and I think that’s the way I’m going to go. As for the other parts, I haven’t finalized whether to powder-coat or paint them, but it’s clear there’s a
lot to consider. So many parts need color—it’s going to take some planning, but I’m up for it.
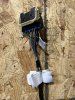
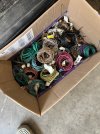
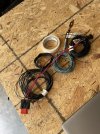
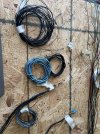
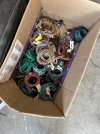
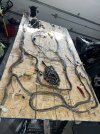
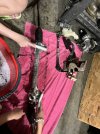
Wire Harness Progress
I haven’t gotten much further on the wiring harness yet, but I’ve decided to give the wires a quick wipe-down—nothing too intense, just a pass with a Clorox wipe or some degreaser to remove the worst of the grime. I’ll see how much I can get done in about 5 minutes and call it good.
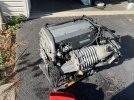
I also need to verify what extra wires the SS/SC harness requires (is it just for the intercooler pump?). I’m thinking about keeping the accessory power connectors for a few fun add-ons, like an ATV speaker on the cage and some charging ports. Oh, and dashboards—wow. Some of the builds I’ve seen with custom dashboards are next-level, and I definitely want to incorporate one into my design.
Next Steps
Once it warms up—or I give in and buy a garage heater—I’ll be diving back into the build. Here’s what’s on my immediate to-do list:
- Finish the wiring harness (and not let it sit too long—thanks for the tips on staying focused!).
- Trim the ignition switch housing.
- Narrow down my color and coating choices and start making decisions.
I’m also still gathering inspiration from the builds I’ve seen here. Some of your projects are absolutely incredible. One of my favorites is the guy with the spoiler that says,
“My other car has doors and ****.” That still cracks me up every time I think about it!
Thanks again for all the encouragement and advice so far. This community has been such a huge help, and I’m looking forward to sharing more updates as things progress. Stay tuned, and happy building!
")


")