• We've upgraded and reskinned the forum. Notice something off? Email us at [email protected] and we'll fix it.

V1 Brian's City Goblin-06/Crate MotorTC #61

Brian74
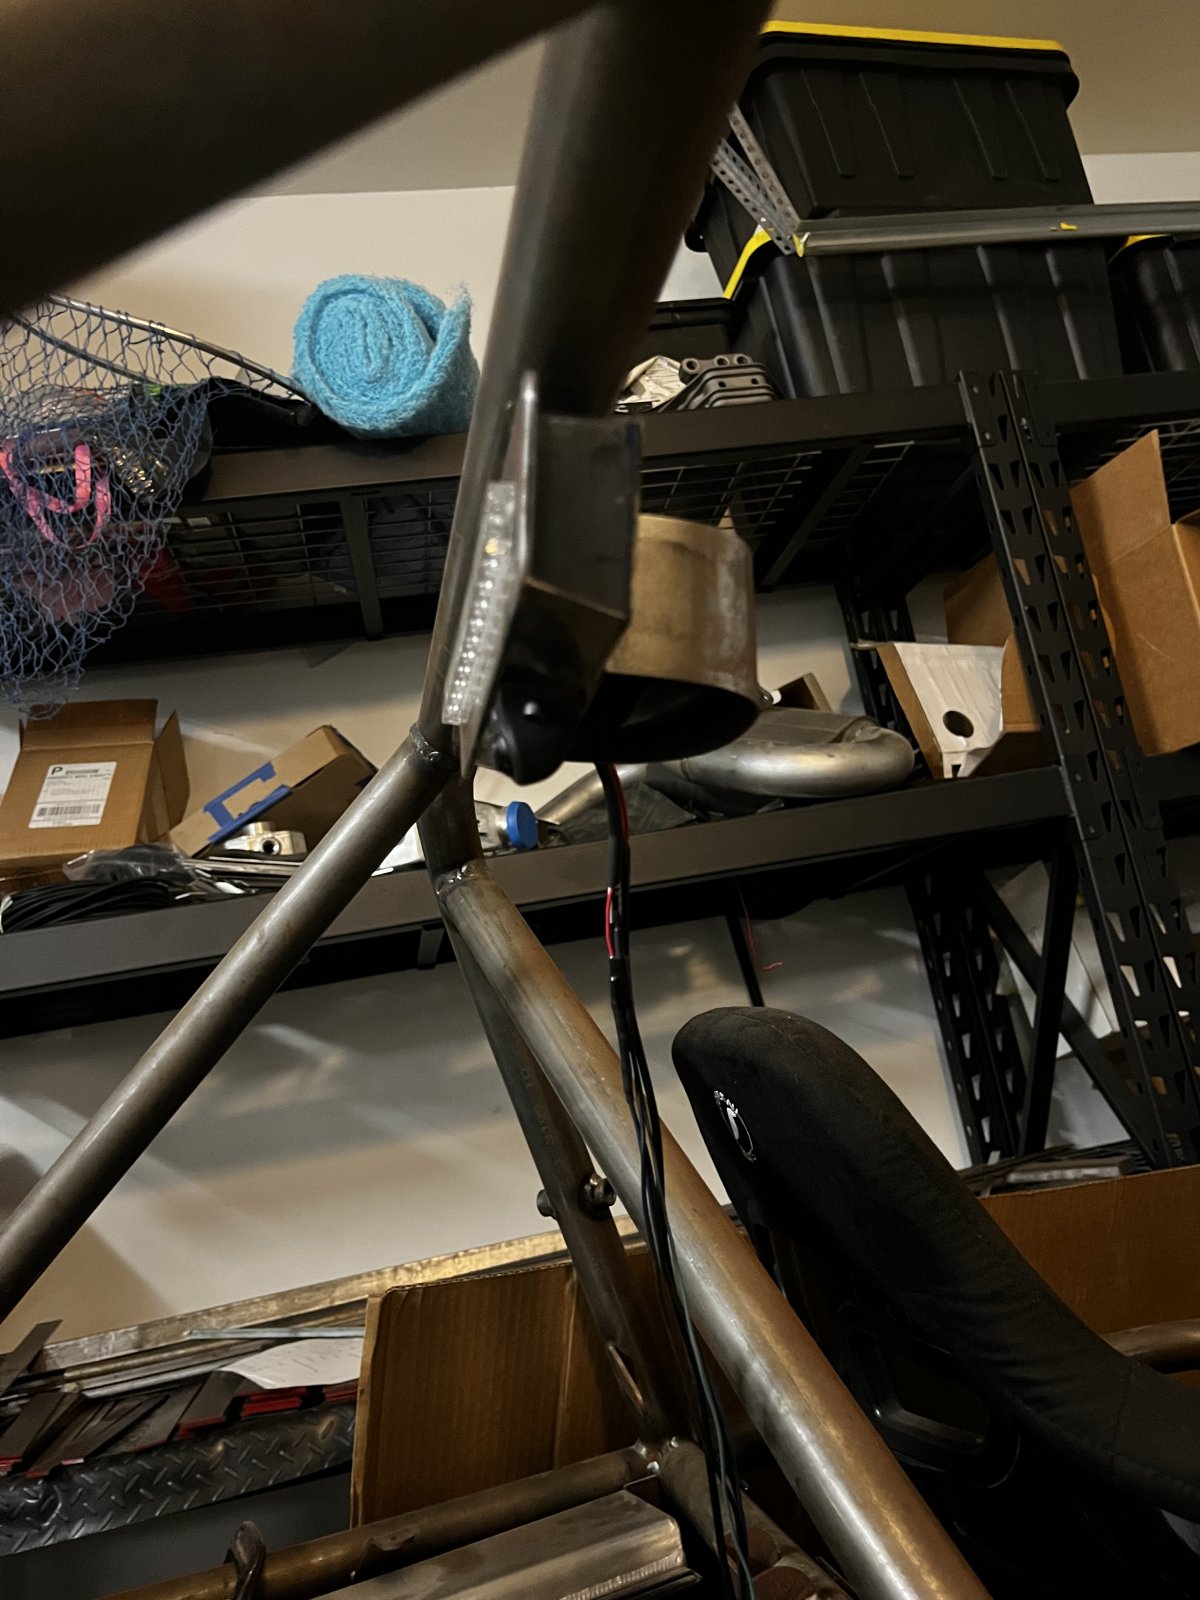
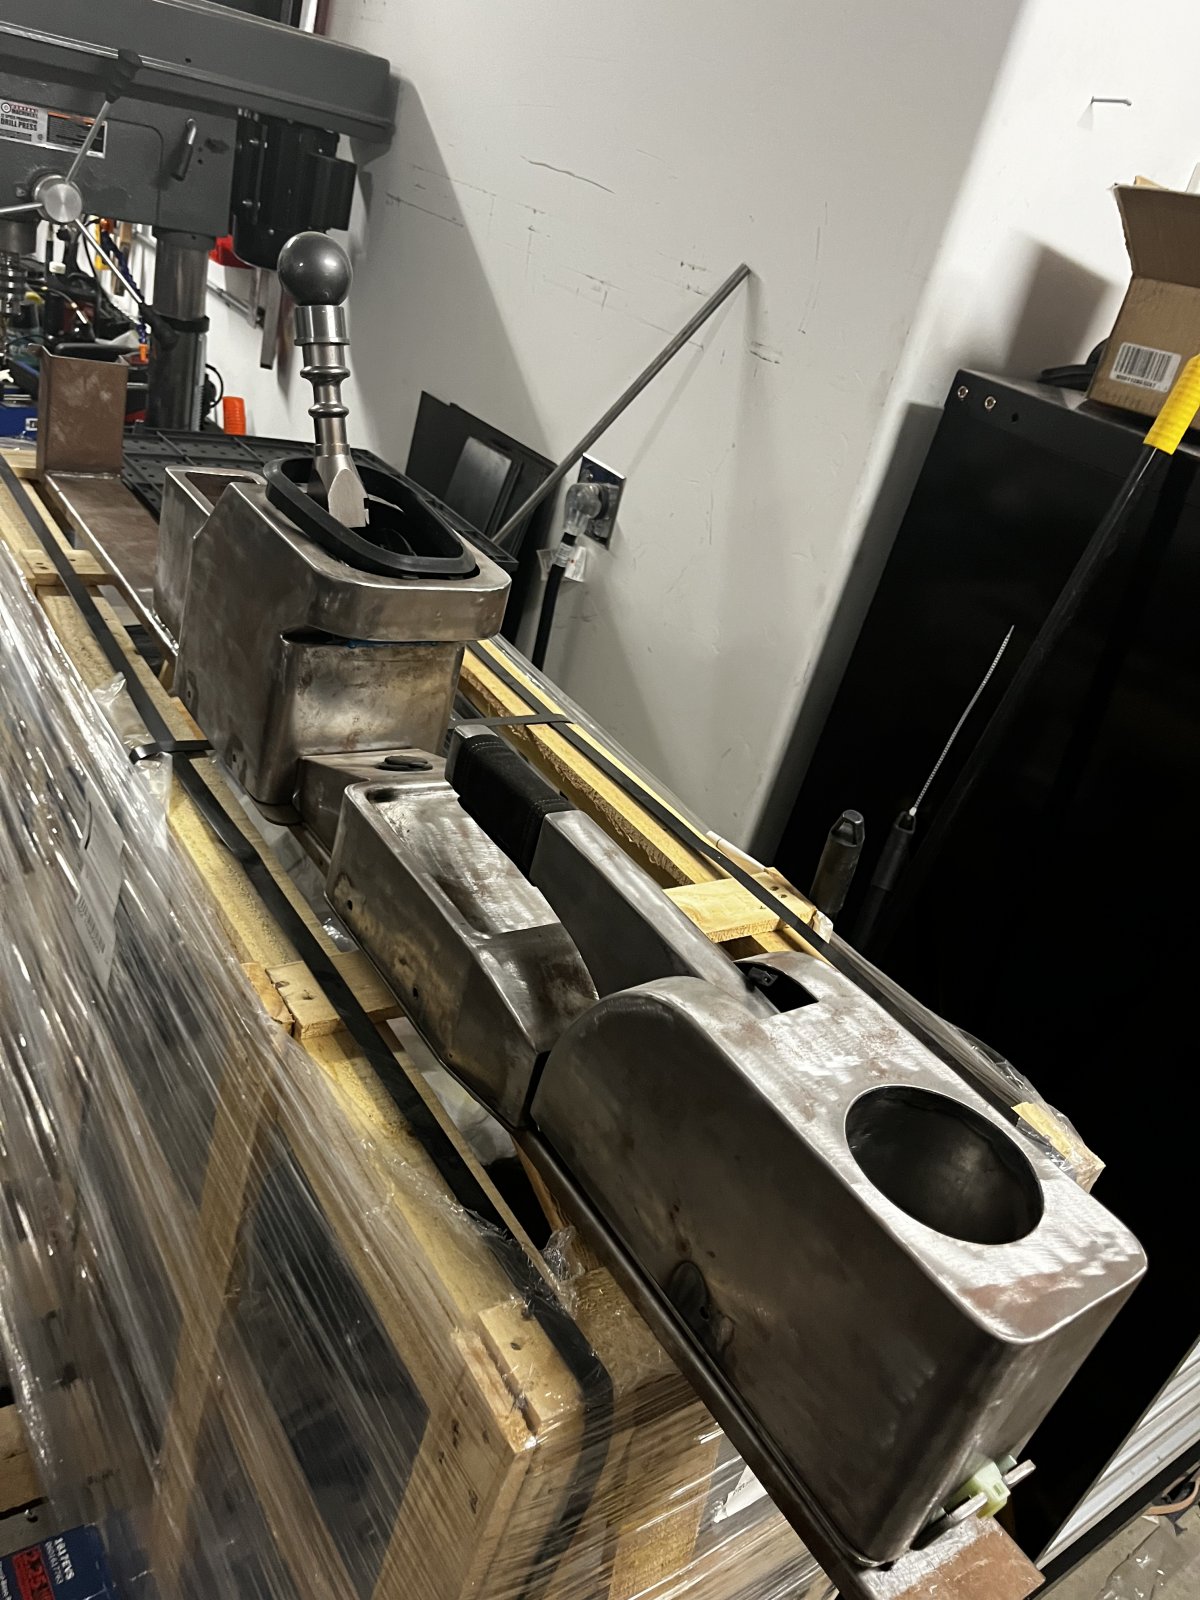
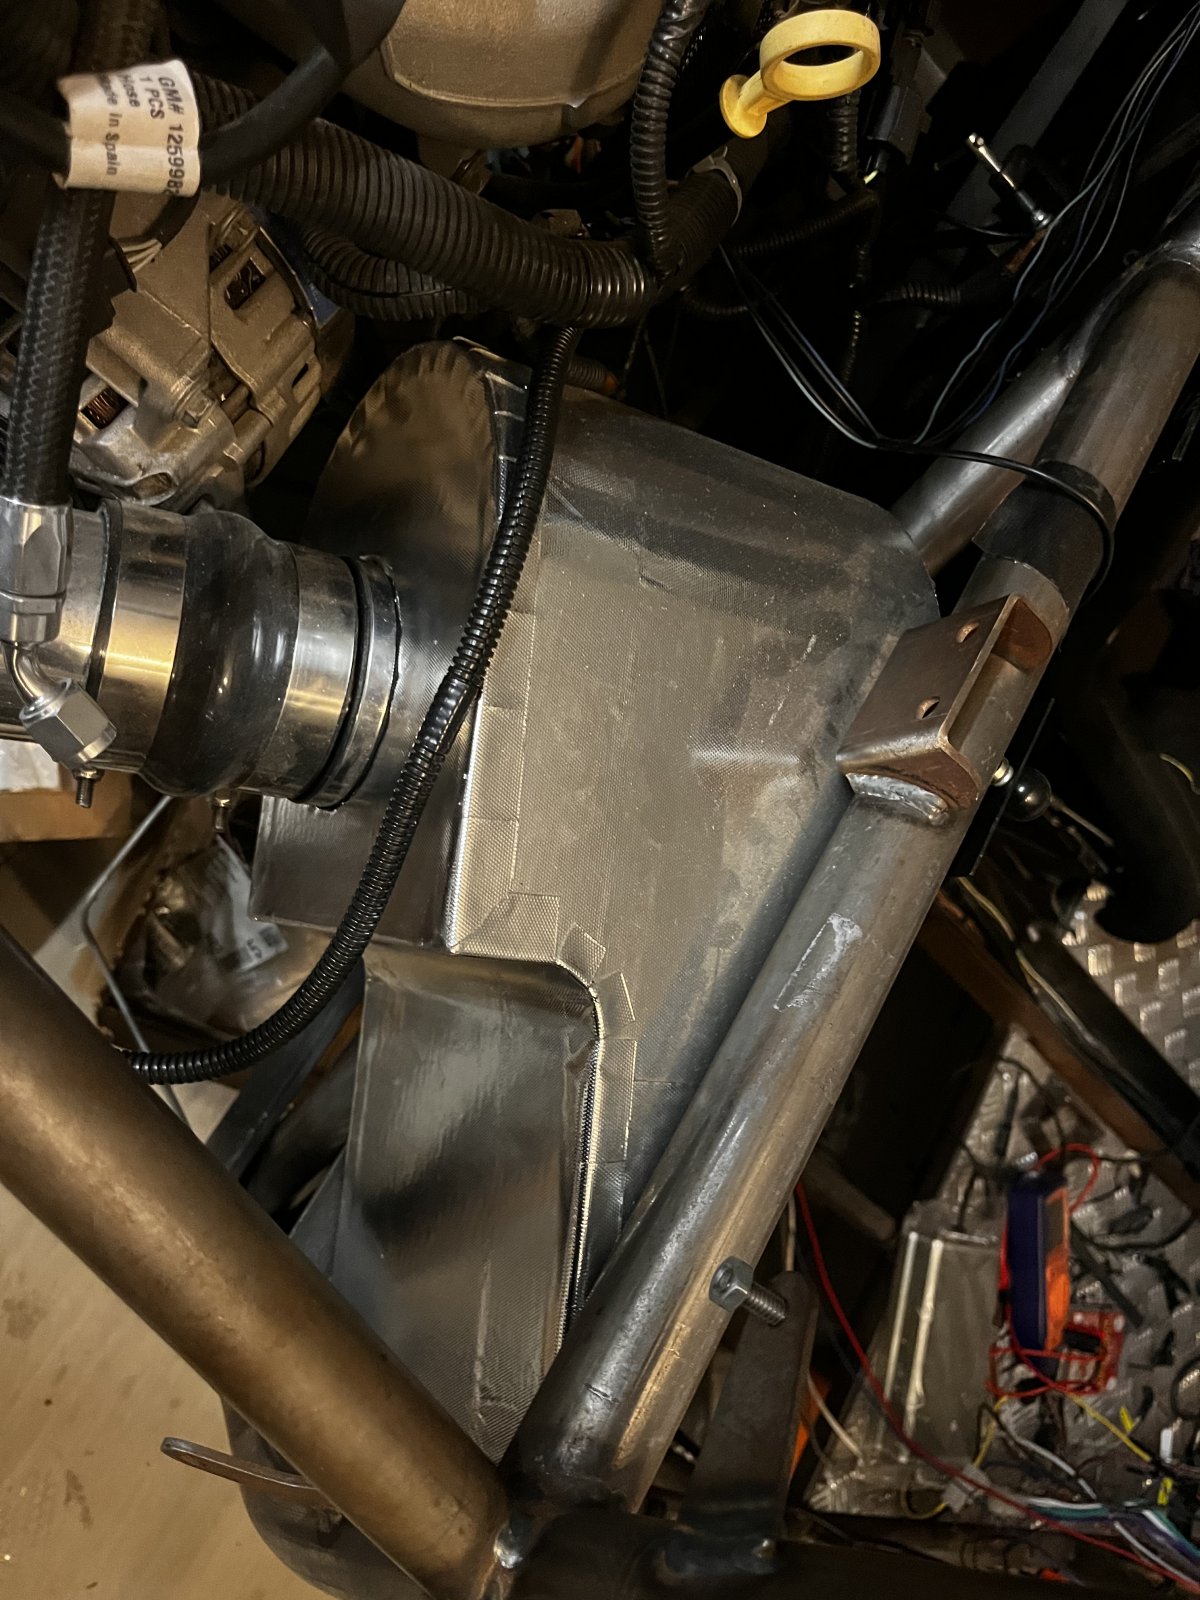
Stuff like this… center console, CHMSL/dome light/rear view camera, air filter housing, various mounts & clamps… Heavy stuff I originally designed out of metal will be 3D printed out of lightweight polymer instead, finally on a printer big enough to print it.
Also makes me more confident to go straight to powdercoat soon as no welded mounting tabs will be needed.

FECAF088-017B-4279-9837-E87909423D3A.jpeg
C473E404-DF19-4FE5-B1D9-9891690004AD.jpeg
393F3B2A-CBB5-42A0-85D0-1A74EF78AAB1.jpeg
 
TravMac
Now that's a pretty machine. Looking forward to the parts you make off it! I'm just getting my first printer after years of watching them get better and better. Now don't even know where to start!
 
Brian74
1st printer is done. It took me a few weeks to get the settings dialed in, but it is printing AMAZING in tolerance and multi material. I took a proven design and modified it to my liking using custom designed parts. I also solved a few design problems along the way and implemented designs of a few others.

End result; it performs exactly as I hoped.

I have 2 more printers left to build.

I never had any idea all this **** was gonna derail my Goblin build this far. Or consume my spare time to this extent… Then again… before I started this build, I’d never welded, bent sheet metal, knew **** about CAD, or 3D printing.

AC0AF401-6949-479E-9EE2-CA3A3D9E65A2.jpeg
C1B537FB-42B1-4513-B657-A01D01B0C89E.jpeg
 
Brian74
Time for your yearly update
Lol... Well, I did order the upgraded DF Goblin shifter last month. Work has been busy and stressful this past year. I am also still crawling out of this @#@&%^$&*@% 3D printing college PhD level self-taught rabbit hole, without regretting the opportunity costs I may have wasted elsewhere, lol. I am fluent in 2 versions of gcode; about to learn the third. This printer I have built and mostly designed is great, but not perfect. I am convinced that it is due to firmware limitations and lack of specific developer interest per my current application and standards. I am halfway through printer build number 2, which will be running on new Linux based firmware and using a much better amount of processing power, speed, and resonance compensation which is more tailored to the type of machines I am building. The hardware on this one is all Chinese-based, but of surprisingly good quality. If this printer delivers, I will build the next one just like it, retrofit the first one, and be done. Fingers crossed...

First up for the Goblin will still be a center console dimensional laser scan, followed by a 3 piece center console design (cupholders, charging port (perhaps a wireless charging pad), console storage box, and E-brake housing. I will also design a 3rd brake light, complete with integrated dome lamps, rear view camera and GPS antenna mount. I also want to redo my enclosed airbox design.

Trust me... I like 3D printing... But I like metal fabrication and building cars much better. To have the ability to efficiently laser scan, CAD design, 3D print, and fabricate metal will be even more fun. My goal is to get the printer **** figured out by the end of this summer and be back on my car project by fall.

I figured I'll start posting again when I get back to my build... Thanks for keeping me in mind.

 
Last edited:
Desert Sasqwatch
Brian, good to hear from you. Guessing your Reserve time has also been taking a bite out of your available time too - thanks again for your service. Let the Desert Rats know if you need help with anything - we are just an IM away. :D
 
Brian74
Well, despite still working through getting 2 more large format 3D printers designed and built, I decided to design a car part. Got on the ole CAD and worked up a HMSL housing, with my rear view camera and dome light integrated. This will drop a huge bunch of weight in comparison to the metal design. Up next... I may redesign some tail lights. Still need to design an airbox, center console, and side panel mounts.

HIBrakelight1.PNG
HIBrakelight2.PNG
HIBrakelight3.PNG
HIBrakelight4.PNG
20240621_214145.jpg
20240621_214524.jpg
 
Brian74
Printer #2 is almost done. I wasted a lot of time on my choice of electronics hardware. This newest (Klipper-based) printer will be running a 64 bit ARM processor, which will fully handle all logic and instruction. The MCU will just handle movement commands. This will provide me with much better print quality and processing headroom; especially for resonance compensation.

Once I get this one tuned, I will retrofit printer #1 and build printer #3 to the same specs. This will allow me to print a rather large volume of the Goblin parts I design quickly and efficiently.

I hope to be done with this and back on the Goblin build by October when the weather cools off. I need to go out and do several laser scans of the Goblin to get some good dimensions.

48465
 
Last edited:
Desert Sasqwatch
Brian, nice work.
thumbs-up-big-foot.gif

I recall when these were just an idea and frames! Hopefully you will get them fired up soon and ready for production. I'm thinking you might have some lingering print jobs that have been waiting on the completion of these?

Once you are ready and/or caught up, I'll be down to scan some parts and get them prototype printed - the designs will be yours if you like them. Looking at some speaker pods (overhead & dash), 'toe bubbles' (I can explain these) and a side pod design to house an intercooler heat exchanger or other.
 
Brian74
Its been a while since I last posted... I have been working tirelessly on the R&D of these 3D printers. I'm finally seeing the light at the end of the tunnel, as all 3 machines are now up and running and printing excellent quality parts. These are unique machines because of their large size, as nobody makes an obtainable machine this big with that is heat insulated with a heated chamber. The last step is to finalize my chamber heater design. This will provide a consistent heated environment for printing larger parts out of UV and heat resistant, high strength plastics that will be suitable for use on a vehicle. I am waiting on a few more custom parts to arrive, then it will be a matter of spending a weekend testing and tuning the printers to dial in the proper PID and chamber heating parameters. The immense advantage here is being able to quickly CAD design large/large batch lightweight parts that otherwise would need to be fabricated from metal; costly parts that would either add weight, require CNC machine, or welding... Simple mounts and clamps; up to full assemblies, such as airboxes, center consoles, light housings, speaker pods, dashboards...

First up are a few custom parts for my Goblin. I designed a relay mount board for my actuated fog lamps. Today I am CAD designing some simple snap-in-place wire loom clamps that will accommodate 5 wire loom sizes and all 3 tubing sizes. I will get started on my center console design soon.
 

Attachments

  • 20250222_200122.jpg
    20250222_200122.jpg
    263.3 KB · Views: 233
  • 20250329_112912.jpg
    20250329_112912.jpg
    179 KB · Views: 222
  • 20250329_140247.jpg
    20250329_140247.jpg
    548.3 KB · Views: 247
  • 20250329_142548.jpg
    20250329_142548.jpg
    440 KB · Views: 214
  • 20250329_142754.jpg
    20250329_142754.jpg
    246.6 KB · Views: 223
  • 20250330_100511.jpg
    20250330_100511.jpg
    398.4 KB · Views: 218
  • 20250330_100525.jpg
    20250330_100525.jpg
    376.1 KB · Views: 215
  • 20250322_190444.jpg
    20250322_190444.jpg
    311.6 KB · Views: 218
  • 20250322_190450.jpg
    20250322_190450.jpg
    272.5 KB · Views: 217
  • 20241226_154646.jpg
    20241226_154646.jpg
    326.7 KB · Views: 221
  • 20250119_161636.jpg
    20250119_161636.jpg
    688.2 KB · Views: 215
  • 20250202_164542.jpg
    20250202_164542.jpg
    427.8 KB · Views: 220
  • 20250202_164845.jpg
    20250202_164845.jpg
    305.5 KB · Views: 206
  • 20250330_103211.jpg
    20250330_103211.jpg
    436.5 KB · Views: 226
  • 20250321_191800.jpg
    20250321_191800.jpg
    329.6 KB · Views: 212
  • 20250322_181650.jpg
    20250322_181650.jpg
    375.6 KB · Views: 221
  • 20250323_163329.jpg
    20250323_163329.jpg
    562.1 KB · Views: 217
Brian74
Ok.. Summer is OVER!!! No more 100 degree garage. All 3 of my 3D printers are done and running perfectly. I have been back on my build now every free minute. The front wiring harness is done. Working on mid harness now. Having the 3D printers are great, because if I need a wiring clamp, I just take a few measurements, CAD design one up and BAM! printed in less than an hour.

33 wires coming from my custom dash. Every wire has been accounted for. For those of you who don't know, I pretty much wired my car from scratch, every single wire. I repurposed a few of the fusebox relays and BCM transistors. I designed the entire wiring harness in modular sections, which makes troubleshooting or removal very easy.

Fortunately I took really good notes on my initial design, which eliminated a lot of stress after revisiting things.

Today I finished looming the forward section, and pinned the two 16 pin dash connectors. I made a dongle with two diodes that can be plugged into the CAN that will pull off the AIM display when I need to pull data through the OBD2 connector.

For those of you adding connectors or doing wiring, I highly recommend Deutsch DTM connectors. Best connectors I have ever used.

I will finish the wiring harness 100% and then move on to a CAD design for the center console. At the rate I am going I plan to have the harness completed in 2-3 weeks.

I will post more pics once the harness is done.

20251018_171013.jpg
20251015_201612.jpg
20251017_163552.jpg
 

Attachments

  • 20251018_172643.jpg
    20251018_172643.jpg
    407.7 KB · Views: 107
Desert Sasqwatch
Brian, good to hear you're working on your Goblin again. Glad to hear you're printers are all up and running, hopefully they are being kept busy? Sounds like your wiring harness is pretty close to complete. I may need to use your notes for my harness, as it sounds like you've modded yours in the same way I would like to configure my harness - mostly scratch, outside of the engine harness.
 
Brian74
All the wiring from the dash forward is complete and wrapped. Today I decided to mock up the billet DF Goblin shifter. Somehow I ended up with an extended frame shifter kit, so the tunnel cover panels dont fit right. I'll fix that later.

Not too happy with their reverse lockout design. I will probably just install a linear solenoid to move the reverse gate lever electronically through a button near the shifter.

Super happy with the shifter itself. I had to cut some cable ends and linkage to bring the shift lever further back where it clears my dash. The shifts are very smooth, precise and short throw.

I do not like the whole rivet the tunnel cover to the tunnel approach. I hope DF improved this concept on their newer build design. There should be no rivets on this car, unless they are holding aluminum spoilers together. I will design something a bit stronger that also facilitates easy removal of the tunnel cover.

I will do some cutting and fitting tomorrow and get the parking brake panel to fit. Then I will remove the entire tunnel cover assembly and do a thorough point cloud laser scan, from which I will CAD design a full 3D printed ASA console, which will provide USB power, small storage, and cupholders.

20251024_145701.jpg
 
Brian74
Spent the better part of the last 2 days drafting out a new CAD design for my center console. Laser scanned both the billet shifter and the e-brake, and converted them to a low poly STP, so I could get dimensions and plot their travel radius, which makes design tolerances much easier. The exposed shifter cable ends added a bit of a challenge.

Center console will be modular 4 piece design, 3D printed in ASA, and will snap in place using magnets for easy installation and removal.

Still need to add USB charging port, reverse lockout solenoid button, and lighting provisions for the storage compartment.

I decided to add small concealed cross tabs on the tunnel cover to bolt the shifter and e-brake down. This will improve rigidity and make removal quick and easy.
20251026_152116.jpg
20251026_165600.jpg
20251027_130025.jpg
20251027_130043.jpg
20251027_161817.jpg
 
Back
Top