• We've upgraded and reskinned the forum. Notice something off? Email us at [email protected] and we'll fix it.

V1 LeoZug's Montana Street Goblin - '05 Cobalt SS donor

Rauq
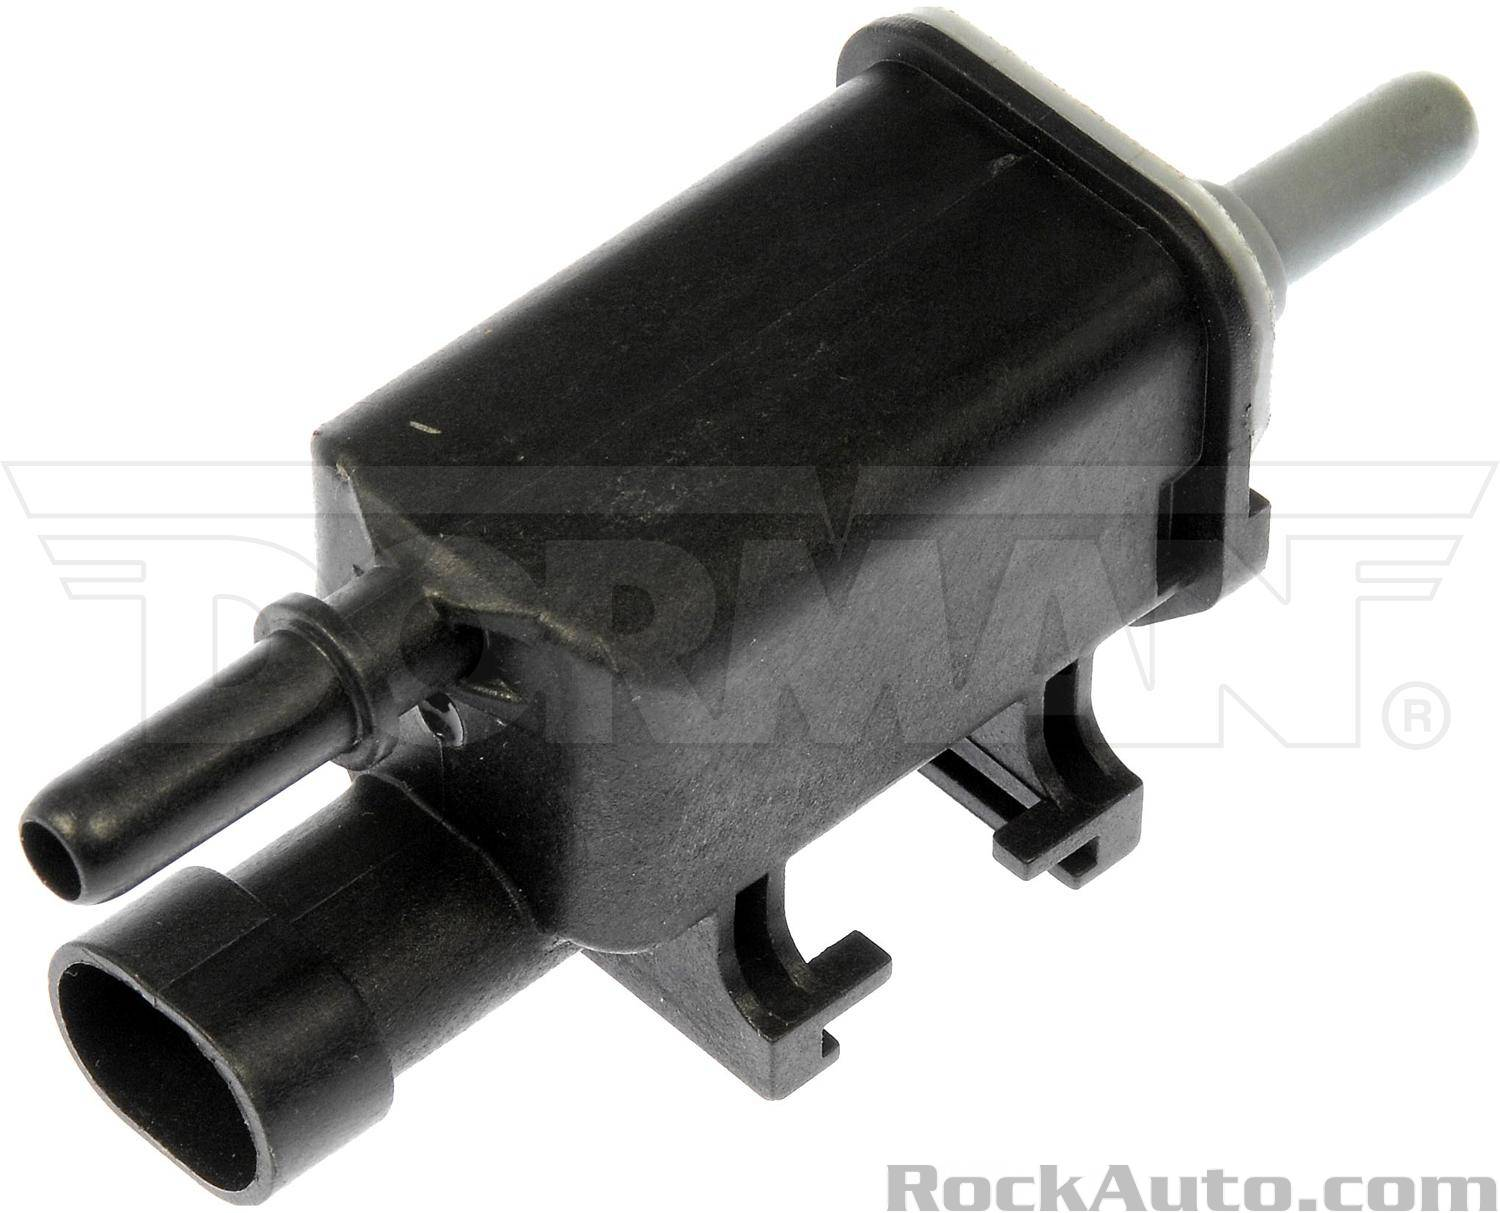
Evap solenoid:
53063


Connects to this port on the throttle body:
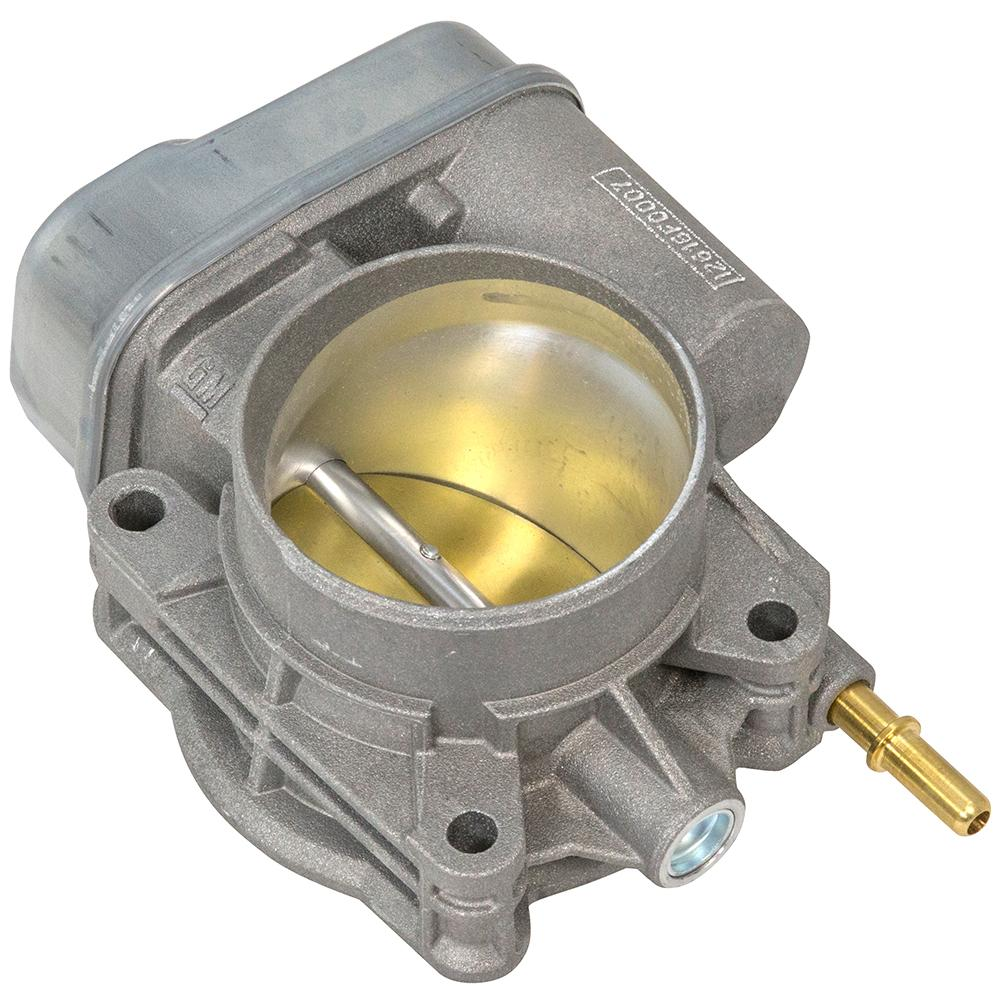
53064


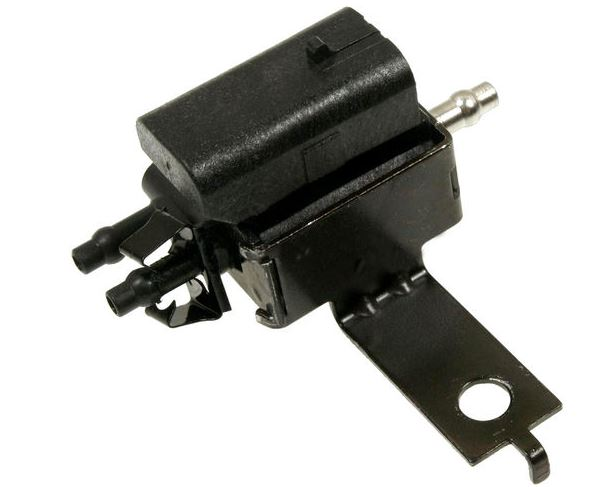
Supercharger bypass valve:
53065

Port with the prongs usually has like a little foam filter over it but is not really important if it's gone. Adjacent port (yellow) goes to the bottom of the bypass actuator, top of the bypass actuator (also yellow) has a short hose that goes to the supercharger housing pre-rotors, opposite port of the bypass solenoid (blue) goes to the small barb on the intake manifold buried under the fuel rails. You can also see the EVAP solenoid that you don't have in the below diagram.
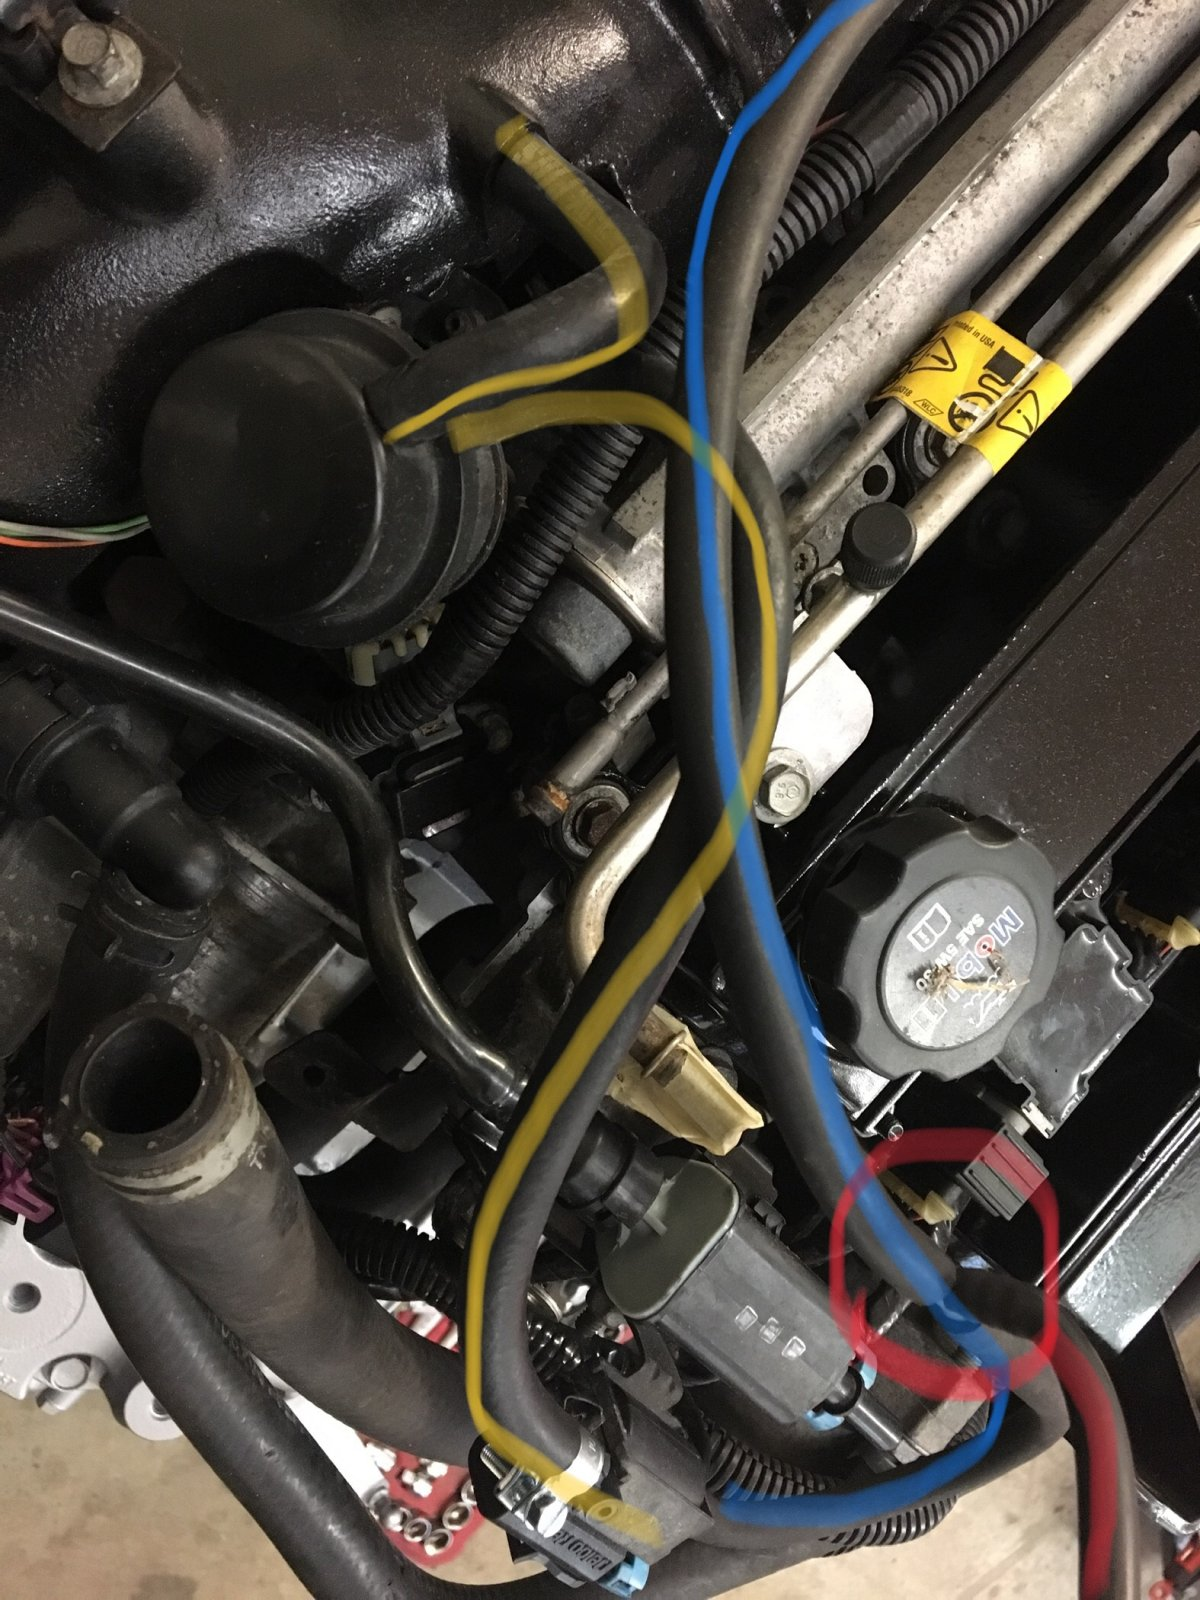
53066


The bypass solenoid can be deleted but there's not really a reason to on any supercharger-only LSJ build.
 
Rauq
The bypass valve solenoid allows the computer to make the bypass valve actuator make the supercharger not make boost, and can also be tuned to limit boost in 1st gear (I think). There was a popular "mod" in the Cobalt world to remove the solenoid in the theory it would make more boost/make boost faster, but I don't see how that would work at all.

The bypass valve actuator can be adjusted, though, to make sure the bypass valve fully closes when it's supposed to be closed, and misadjustment can prevent the valve from fully closing which will essentially cause an internal boost leak. The only symptom would be less boost/power which may or may not be noticeable. The easiest way to do that is with the blower off so you can make sure that the butterfly fully closes, but if you haven't loosened/removed your bypass valve actuator, it's probably fine to leave it alone.
 
Robinjo
There was a popular "mod" in the Cobalt world to remove the solenoid in the theory it would make more boost/make boost faster, but I don't see how that would work at all.

I believe mine came with the mod but the guy I bought it from said either the bypass valve or solenoid failed so he did the mod. This is how mine is routed. I will note that this is not proper, but it works.

IMG_3382.JPGIMG_3383.JPGIMG_3384.JPG
 
Rauq
Yep that works, the actuator will open the valve with manifold vacuum and close it without vacuum (at least mid-throttle, all the way to max boost).

Only potential harm to this is if the PCM wants to dump boost for whatever reason, it can't, and you can't tune for partial boost in 1st gear (which I never had any luck with).

Only potential benefit to this is eliminating a potential source of failure or to not have to replace a failed solenoid. Although, I don't know if the solenoid's failure mode would be to connect the boost source to the bottom port, in which case you just wouldn't be able to make boost.
 
L
Thanks for the feedback guys. I'm slowly getting the wires and hoses organized in the engine area.

I've got a plug on the firewall side of the engine that I can't really see into so I can't see what the plug should look like. I've tried putting a few of the random plugs from the engine harness into it but none fit. This pic shows which plug I'm talking about.
 

Attachments

  • ecotec20_sc2_480x480.jpeg
    ecotec20_sc2_480x480.jpeg
    39.9 KB · Views: 152
Dale E
Oil pressure sender???? Dang it! I'm just going to have to build a Goblin so I can help identify this stuff!!
 
L
I'm wondering if I have plug hanging down somewhere that I cant see. I can't find anything that goes into that! I'm done some digging online and it looks like a white plug with a green rubber accordion. Can anyone confirm that?
 
Rttoys
The plug should be on the engine wiring harness. Theoretically, you shouldn’t have touched it doing the transfer.
 
L
Regrettably we took all the wires off when we were taking the engine out (and cleaning it). Now with the car mostly assembled, its pretty tough to get them back on.
 
Rauq
It's just an oil pressure switch, not an actual sender, so it's just reporting yes/no on whether it has more oil pressure than whatever the switch is built for, and I don't know what that pressure is. I don't know if a bad signal does anything more than put a light on the dash.

I can't find whether that's a normally open or normally closed switch, but I would guess it's a normally open switch, meaning that good oil pressure closes the switch. I assume that because a cut wire or unplugged connector would indicate the same as no oil pressure, which makes sense in configuration. I think the switch grounds through the engine block, thus the single wire back to the PCM. All that to say, if you wanted to delete the switch... you'd need to ground pin 48 on the C2 connector on the PCM. Or, if that wire turns out to have been from your harness, and you bought a new connector/pigtail, that's where you'd wire it back to.

53083


I'll also add, since you're going through unknown connectors on the front of the block, my LSJ has like a 9" extension harness on the crankshaft position sensor. I think this is on all LSJs. That extra connector doesn't show on the electrical schematics, and from what I recall, the wire colors are the same going into and coming out of the extension harness, but just double check that you've got purple and yellow in the right spot on the connector on the sensor on the block. I believe the CKP sensor is a VR sensor which does care about polarity.
53087
1753210281953.png
 
L
Thanks for the info. Are you saying I may need to create my own crankshaft position sensor if I can't find mine? I know nothing about electronics stuff or wiring besides being able to solder fairly well.
 
Rauq
No, just food for thought on the crankshaft position sensor wiring. If you hooked a connector onto the CKP and didn't think anything of it, you're probably fine. If you were struck by something that made you say "hmm..." then might be worth a double check. If something is off, worst case scenario your engine won't start or run. I can't imagine it causes damage to hard parts. It wouldn't be the hardest thing to diagnose either. Hope I didn't make you worry needlessly.
 
L
No, just food for thought on the crankshaft position sensor wiring. If you hooked a connector onto the CKP and didn't think anything of it, you're probably fine. If you were struck by something that made you say "hmm..." then might be worth a double check. If something is off, worst case scenario your engine won't start or run. I can't imagine it causes damage to hard parts. It wouldn't be the hardest thing to diagnose either. Hope I didn't make you worry needlessly.
Gotcha. Appreciate it! At this point in the project I'm pretty much just trying to match plugs to sockets without really knowing what they are. When I have extra plugs I'll start to hunt down if I need them or not or if I can cut them. I'll probably wait till the car is driving around before I cut anything off unless it's 100% safe to do so. For instance, on the passenger side of the engine toward the firewall, I have a second "fan" plug that I think can be cut off but I'm nervous to do so.
 
L
We labeled as many things as we could on the engine harness but some were hooked to things that are no longer being used. Our fault. DF did the main harness and labeled open wires but not connectors. Their fault?
 
comegetjoe
How do you disconnect all of this stuff without labeling and taking pictures. If DF is doing wiring harness with out labeling, that’s a problem also.

My open end wires came back labeled from DF (steering wheel buttons, intercooler power, fog lights, mirrors, etc), but my connectors did not have labels when it came back. With the exception of a couple, everything sort of fell into place with how long the wires were.
 
Back
Top